Gravoarele cu laser cu fibre sunt instrumente puternice pentru marcarea și gravarea cu precizie pe o varietate de materiale. For experienced users, mastering specific techniques and settings can elevate the quality of their work. This guide provides an in-depth look at advanced operations, safety measures, machine setup, software usage, întreţinere, depanare, și altele.
Cuprins
1. Siguranța mai întâi: Essential Precautions
Echipament de protecție:
- Always wear specialized safety goggles designed for fiber lasers to protect your eyes from harmful laser radiation.
- Use protective enclosures or shields, especially in open work environments, to prevent exposure to stray laser beams.
Ventilare:
- Ensure your workspace is well-ventilated. Fiber laser engraving can produce harmful fumes and dust, particularly when working with certain metals and plastics. A proper ventilation system or an exhaust fan is crucial to maintain air quality and safety.

2. Proper Installation and Setup
Machine Installation:
- Position your gravator laser cu fibra on a stable, level surface.
- Connect the power supply to a grounded outlet, ensuring it matches the voltage specifications of your machine.
- Link the machine to your computer via USB or Ethernet, depending on the model, and install any necessary drivers.
Calibration and Focusing:
- Calibration: Use the machine’s software or built-in tools to calibrate the laser head. This involves aligning the laser path and ensuring that mirrors (if applicable) are correctly positioned.
- Concentrarea: Adjust the focal length according to the material’s thickness. This step is crucial for achieving sharp, precise engravings. Many machines include focus tools or focus lasers to assist in this process.

3. Software Selection
Popular Software Options:
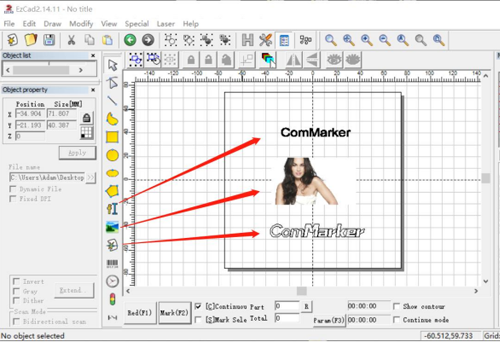
- EZCAD: Widely used for its simplicity and powerful features. Suitable for creating intricate designs and supports a variety of file formats.
- LightBurn: Known for its intuitive interface and advanced features like image tracing and layer management. It’s ideal for users looking to integrate complex designs and effects.

Design Importing:
- Import vector files (such as SVG, DXF) or raster images (JPG, PNG) into your chosen software. Ensure that the file is properly formatted and scaled to fit the engraving area.
- Make necessary adjustments, such as resizing, repositioning, or editing the design to fit your project’s requirements.
4. Setări parametri
Key Parameters:
- Putere: Adjust according to the material’s hardness and thickness. Higher power settings are generally needed for harder materials.
- Viteză: The speed at which the laser head moves. Faster speeds are suitable for lighter engravings, while slower speeds are necessary for deeper cuts.
- Frecvență: The frequency of the laser pulses. Adjusting this can affect the engraving quality and speed.

Material Considerations:
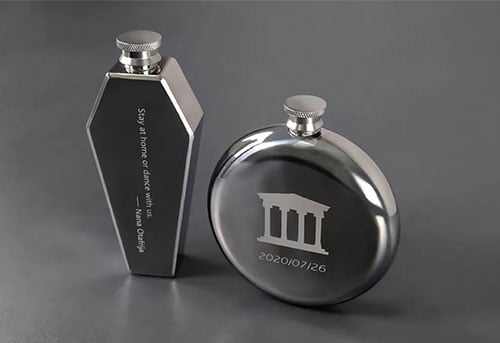
- Metalele: Typically require higher power and slower speed. Metals like stainless steel or titanium may also need frequency adjustments to optimize the engraving depth and clarity.
- Materiale plastice: Use lower power settings to avoid melting or warping. Adjust the speed and frequency to achieve clean cuts without burning.
5. Practical Operation
Pregătirea materialului:
- Clean the surface of the material to remove any oils, praf, or residues that could affect the engraving quality.
- Secure the material firmly on the workbed to prevent movement during the engraving process.
Test rulează:
- Conduct a small test engraving in an inconspicuous area or on a scrap piece to verify the settings. This helps avoid costly mistakes and ensures optimal results.

Operational Steps:
- Load your design file into the software and configure the machine settings.
- Position the material on the workbed and ensure it’s properly focused.
- Start the engraving process, monitoring the machine closely for any irregularities.
- La finalizare, carefully remove the material and inspect the engraving.
6. Maintenance and Upkeep
Curățare regulată:
- Clean the laser lens and mirrors (if applicable) regularly to ensure optimal performance. Use a lint-free cloth and appropriate cleaning solutions.
Part Replacement:
- Keep track of consumables like lenses and protective windows. Replace these parts when they show signs of wear to maintain laser quality.
Actualizări software:
- Regularly update your software to access the latest features and bug fixes. Check the manufacturer’s website for updates and support.
7. Depanarea problemelor comune
Common Problems and Solutions:
- Uneven Engraving: Check the focus and ensure the workbed is level. Uneven material surfaces can also cause issues.
- Insufficient Power: Verify that the laser settings are correct for the material. If the laser appears weak, inspect the lens and mirrors for cleanliness.
- Glitches software: Ensure that your software is up-to-date. Reinstall if necessary and check for compatibility with your operating system.
Technical Support and Resources:
- Refer to your machine’s manual and ComMarker’s support for troubleshooting tips. Online forums and communities can also be valuable resources for solving specific issues.
8. Showcase and Tutorials
Video :
9. Additional Resources
Tools and Accessories: