Understanding the Problem of Blurry Laser Engraving
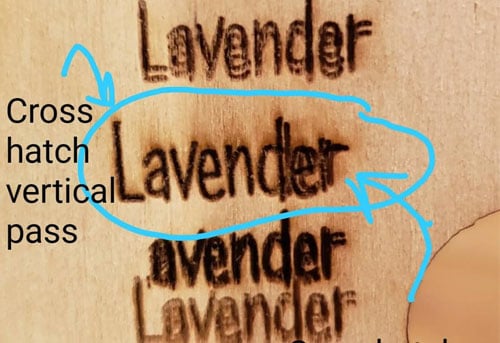
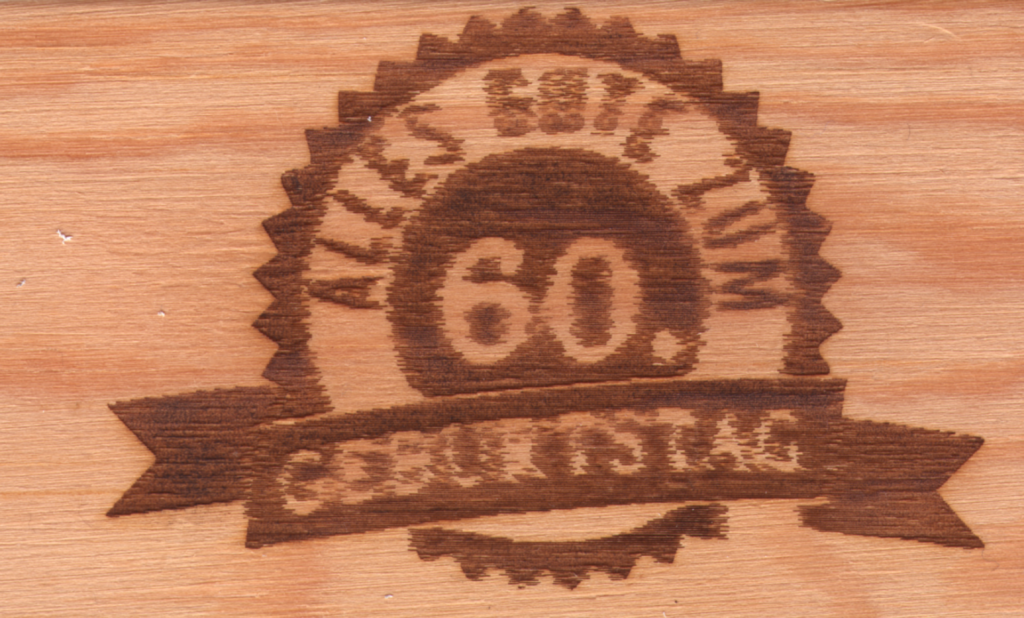
Gravura cu laser is a precise and intricate process that allows professionals to carve detailed designs, logos, and patterns into a wide variety of materials. in orice caz, even with the latest equipment and settings, one common problem that many gravatoare cu laser face is blurry or unclear engravings. Whether you’re working on metals, materiale plastice, lemn, or even glass, blurry engravings can undermine the quality of your work and lead to wasted time and materials.
In this comprehensive article, we will explore the reasons why laser engravings may appear blurry, identify common causes, and provide detailed solutions to fix the issue. We will also discuss how to fine-tune your settings, maintain your equipment, and troubleshoot common issues to ensure that every engraving is sharp, clar, and high-quality.
What Causes Blurry Laser Engraving?
Blurry laser engraving is typically a result of either issues with the laser machine itself, improper settings, or the material being engraved. Let’s dive into some of the most common causes of blurry laser engravings.
1. Incorrect Focus
One of the most common causes of blurry laser engravings is incorrect focusing. When the laser beam is not focused properly on the surface of the material, the engraving becomes uneven, blurry, or unclear.
- Explanation: The laser beam has a focal point where it is most concentrated, and this point should be aligned perfectly with the surface of the material. If the focus is too high or too low, the engraving will not be as sharp, and the lines may appear blurry.
- Soluţie: Ensure that your laser head is properly aligned with the material’s surface. Use your machine’s autofocus feature or manually adjust the focus to the correct height, depending on the material you’re working with. If your machine doesn’t have autofocus, check the manufacturer’s guide for the proper focal length.
2. Low Resolution or DPI Settings
Another factor contributing to blurry engravings is low resolution or low dots per inch (DPI) setări. DPI refers to the number of dots the laser engraver produces per inch of material. A low DPI means fewer details and a more pixelated or blurry appearance.
- Explanation: The higher the DPI, the finer the engraving will be. A low DPI may be sufficient for simple designs but can lead to blurriness in more detailed work, such as logos or intricate patterns.
- Soluţie: Increase the DPI settings in your engraving software. For highly detailed work, a DPI of 300 la 600 is typically ideal. in orice caz, note that increasing the DPI can slow down the engraving process, so balance speed with quality as needed.
3. Incorrect Speed and Power Settings
Laser engravers work by controlling both speed and power. If the speed is too fast or the power is too low, the engraving may be faint or blurry. Invers, too much power and too slow a speed can lead to unwanted melting or burning of the material.
- Explanation: Speed controls how quickly the laser moves across the material, while power affects the intensity of the laser beam. If both are not properly balanced, the laser may not produce the desired results, leading to unclear, blurry engravings.
- Soluţie: Adjust your speed and power settings according to the material you’re working with. Pentru detalii fine, you may need to slow the speed and reduce the power to avoid excessive heat or burning. Test your settings on scrap material first to find the ideal balance.
4. Inconsistent Power Distribution
If your laser engraver’s power distribution is uneven, it can result in blurry engravings. This may happen due to wear and tear on the laser tube, contamination on the lens, or issues with the laser’s power supply.
- Explanation: Uneven power distribution means that certain areas of the engraving will receive more or less laser power than needed, causing the marks to appear blurry or faded.
- Soluţie: Regularly maintain your machine to ensure that the laser tube is in good condition and the power supply is functioning properly. Clean the lens and mirrors regularly, as dirt or contamination can reduce the laser’s effectiveness. If your power settings seem inconsistent, it might be time to replace the laser tube or check the power supply.
5. Material Issues
Uneori, the material you’re engraving on may be the source of the blurriness. Materials with uneven surfaces or reflective properties can cause the laser beam to scatter, leading to unclear engravings.
- Explanation: Materials like certain metals, materiale plastice, and glass may scatter the laser light, which can cause distortion in the engraving. În plus, materials with very smooth or reflective surfaces may cause focusing issues.
- Soluţie: Choose the right material for your laser engraver and ensure that the material surface is clean and free of contaminants. For reflective materials, use special coatings or adjust the laser settings to achieve the best results. În plus, consider using air assist or a proper lens to help focus the beam more accurately on the material.
6. Poor Machine Calibration
If your laser engraver is not properly calibrated, the laser may not operate at its optimal settings, leading to blurry engravings.
- Explanation: Calibration ensures that the laser is correctly aligned with the material and that the focus, putere, and speed settings are accurate. Without proper calibration, your engraver may struggle to create precise marks.
- Soluţie: Perform regular calibration and maintenance on your machine. Check the user manual for instructions on how to calibrate your laser. Some machines offer automatic calibration features, while others require manual adjustments.
7. Improper Material Thickness
The thickness of the material being engraved can also affect the sharpness of the engraving. Thicker materials may require more power and slower speed, while thinner materials may need faster speeds and lower power.
- Explanation: For thick materials, the laser may not penetrate evenly, leading to blurry or inconsistent engravings. Pe de altă parte, thin materials may be too fragile to handle high power settings, causing distortions.
- Soluţie: Adjust the power and speed settings based on the material thickness. Use the appropriate focal length for thick and thin materials, and always test your settings on scrap pieces before engraving your final project.
How to Fix and Prevent Blurry Laser Engraving
To fix and prevent blurry laser engravings, you must consider the following steps:
Etapa 1: Fine-Tune Focus Settings
Properly focus the laser beam for the material you’re working with. This is one of the most critical factors in achieving clear, sharp engravings.
Etapa 2: Adjust Resolution and DPI Settings
Set the resolution and DPI to higher values for detailed designs. Aim for a DPI range of 300 la 600 for precision work.
Etapa 3: Optimize Speed and Power
Adjust the speed and power settings to match the material and design. Start with lower power and slower speeds for fine details, then gradually adjust as needed.
Etapa 4: Clean and Maintain the Laser Machine
Regularly clean the lens, oglinzi, și alte componente ale mașinii. Check the laser tube’s condition and replace it if necessary to avoid inconsistent power output.
Etapa 5: Test and Experiment with Materials
Before starting on the final material, test the settings on scrap pieces. This helps ensure that the settings are optimal for the material, preventing blurry results.
Etapa 6: Proper Calibration
Ensure your laser engraver is properly calibrated. Calibration ensures accuracy and proper alignment of the laser, preventing blurry results due to misalignment.
Etapa 7: Use the Right Materials
Choose materials that are compatible with your laser engraver and avoid those with highly reflective or uneven surfaces. For challenging materials, consider using specialized coatings to help with the engraving process.
Common Mistakes to Avoid in Laser Engraving
While you work to avoid blurry engravings, here are some common mistakes to watch out for:
- Incorrect Focus Settings: A misfocused laser will lead to fuzzy engravings.
- Too Low of DPI: Low resolution is fine for larger designs but may make intricate details appear pixelated or blurry.
- Using High Speed on Detailed Designs: Fast speeds are better suited for larger engravings, not intricate details.
- Inconsistent Power Settings: Varying power settings throughout the engraving process can cause uneven results.
- Skipping Material Tests: Testing your settings on scrap material before engraving on your final piece is essential.
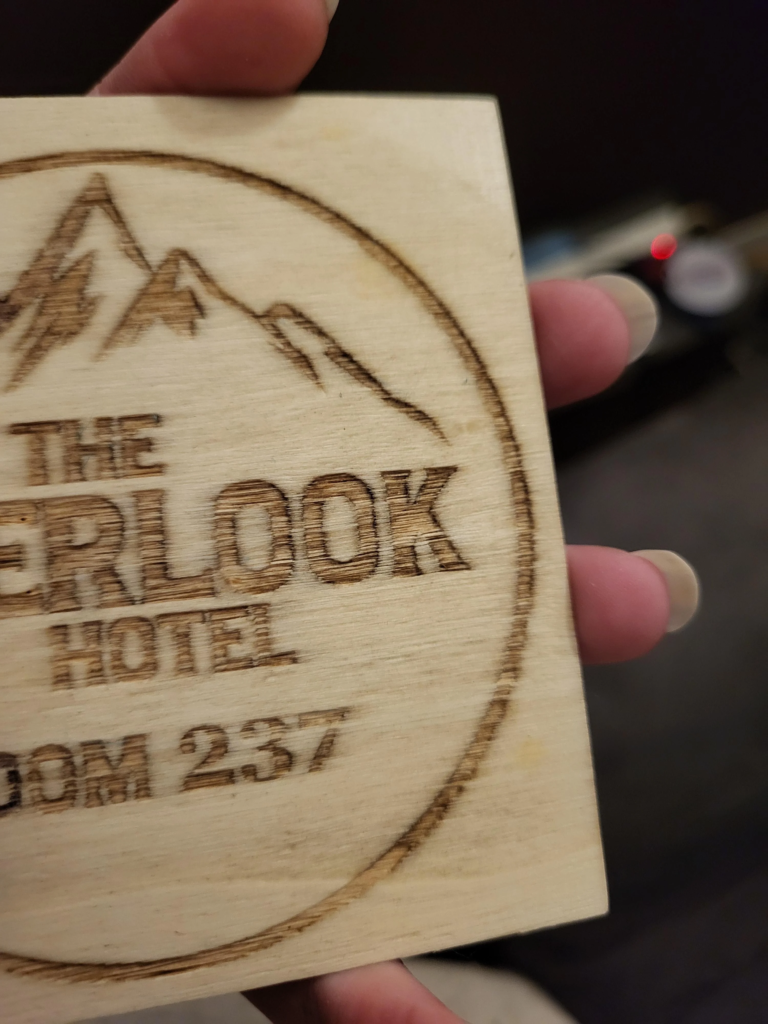
Blurry laser engravings can be frustrating, but with the right knowledge and attention to detail, they can be avoided. By understanding the causes of blurriness — including focus issues, incorrect settings, material problems, and machine calibration — you can ensure that every engraving you create is sharp, precis, and professional.
Ține minte, laser engraving is a highly technical process that requires consistent practice and fine-tuning. By following the best practices outlined in this article, you can eliminate blurriness and elevate your engraving work to new levels of precision and clarity. Whether you’re engraving metals, materiale plastice, lemn, sau alte materiale, getting the settings just right will help you create flawless, high-quality engravings that your clients will love.


