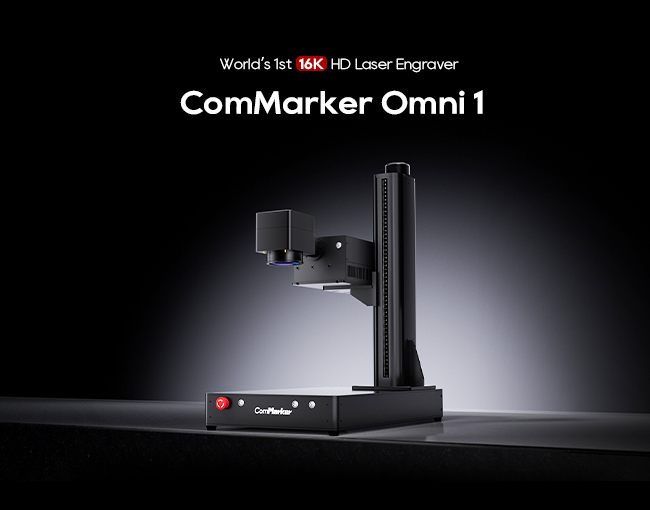
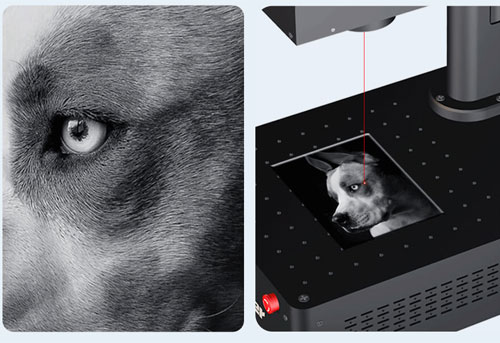
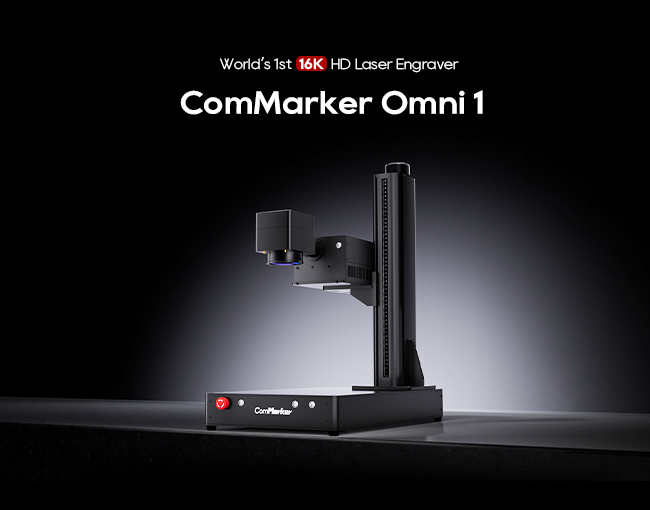
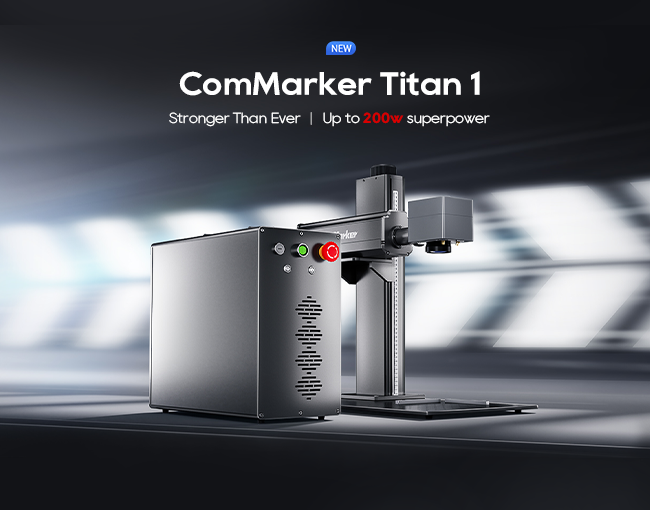
يعد النقش بالليزر تقنية دقيقة ومتعددة الاستخدامات تستخدم لحفر التصميمات, الشعارات, نص, وأنماط معقدة على مواد مختلفة. باستخدام شعاع مركّز من الضوء, آلات نقش الليزر تزيل المواد أو تغيير سطحها, ترك العلامة الدائمة. أصبحت هذه التكنولوجيا شائعة في الصناعات التي تتراوح من التصنيع إلى الفنون والحرف بسبب دقتها, التكرار, والقدرة على العمل مع مجموعة واسعة من المواد مثل الخشب, معدن, أكريليك, والزجاج.
يقدم نقش الليزر مزايا مهمة على أساليب النقش التقليدية. إنه بلا اتصال, وهذا يعني أنه لا يوجد تبلى على الأدوات, إنه قابل للتخصيص إلى حد كبير, السماح للمستخدمين بإنشاء تصميمات معقدة بسهولة. The precision of laser engraving also ensures that even the most intricate patterns are accurately reproduced.
جدول المحتويات
Importance of a Well-Crafted Engraving File
يعتمد نجاح أي مشروع نقش بالليزر اعتمادًا كبيرًا على جودة ملف النقش المستخدم. يضمن الملف المصنوع جيدًا أن يعمل نقاش الليزر بكفاءة, إنتاج حاد, ينظف, والنتائج المتسقة. يمكن أن تؤدي الملفات المعدة بشكل سيئ إلى العديد من المشكلات, مثل الاختلال, عمق النقش غير المتكافئ, أو حتى الأضرار التي لحق بالمواد المحفورة.
يجب تنسيق ملف نقش جيد بشكل صحيح, تم تحسينه لآلة الليزر, ومصمم للمادة المحددة المستخدمة. يتضمن هذا النظر بعناية في عوامل مثل نوع الملف, دقة, وإعدادات نقاش الليزر. يمكن أن يؤدي استثمار الوقت في إنشاء ملف عالي الجودة إلى توفير وقت وموارد كبيرة أثناء عملية النقش, وكذلك إنتاج نتائج متفوقة.
Understanding Laser Engraving
ما هو نقش الليزر?
نقش الليزر هو عملية استخدام ليزر لإزالة المواد من سطح كائن لإنشاء تصميم, صورة, أو نص. يتم توجيه شعاع الليزر على السطح, حيث تبخر أو يحرق المواد, ترك العلامة الدائمة. يمكن التحكم في عمق وشدة النقش عن طريق ضبط قوة الليزر, سرعة, والتردد.
يستخدم نقش الليزر بشكل شائع في الصناعات مثل صنع المجوهرات, لافتات, إلكترونيات, والتخصيص الشخصي. كما أنها شائعة بين الهواة لإنشاء هدايا مخصصة, زينة, والفن.
أنواع آلات النقش بالليزر
هناك عدة أنواع من آلات النقش بالليزر, كل منها مصمم لتطبيقات ومواد محددة:
- ليزر ثاني أكسيد الكربون: هذه هي النوع الأكثر شيوعًا من نقوش الليزر, مناسبة للمواد غير المعدنية مثل الخشب, أكريليك, زجاج, جلد, والنسيج. تعمل على طول موجة من حولها 10,600 نانومتر.
- ليزر الألياف: ليزر الألياف هي مثالية لوضع علامات ومعادن نقش مثل الفولاذ المقاوم للصدأ, الألومنيوم, نحاس, وغيرها من المواد الصلبة. تعمل على طول موجة من حولها 1,064 نانومتر, مما يجعلها فعالة للغاية لنقش المعادن التفصيلي والدقيق.
- ليزر ديود: عادة ما تستخدم ليزر الصمام الثنائي لنقش مواد ليونة مثل الخشب والمواد البلاستيكية. هم أقل قوة من أشعة الليزر CO2 والألياف, جعلها مناسبة للتطبيقات الأقل تطلبًا.
- الأشعة فوق البنفسجية: أشعة الليزر فوق البنفسجية تعمل على طول موجة من 355 NM وتستخدم في نقش عالي الدقة على مواد حساسة مثل الزجاج, سيراميك, وبعض المواد البلاستيكية. غالبًا ما يتم استخدامها في صناعة الإلكترونيات لتمييز لوحات الدوائر والمكونات الأخرى.
Common Materials for Laser Engraving
يمكن للنقاشين بالليزر العمل مع مجموعة متنوعة من المواد, كل يتطلب إعدادات واعتبارات مختلفة:
- خشب: شعبية لبراعة وسهولة النقش. أنواع مختلفة من الخشب تستجيب بشكل مختلف لنقش الليزر, مع حرق الأخشاب الأكثر ليونة بسهولة أكثر من أصعبها.
- معدن: المعادن مثل الفولاذ المقاوم للصدأ, الألومنيوم, والنحاس محفور عادة باستخدام ليزر الألياف. يمكن استخدام عملية النقش لإنشاء علامات مفصلة, الشعارات, والنص.
- أكريليك: غالبًا ما يتم استخدام الأكريليك للافتات والعروض بسبب وضوح وسهولة النقش. يمكن نقشها لإنشاء تأثيرات متجمدة أو واضحة, اعتمادًا على الإعدادات المستخدمة.
- زجاج: نقش الليزر على الزجاج يخلق تأثيرًا متجمدًا. هذا شائع الاستخدام للعناصر الزخرفية, الجوائز, واللافتات.
- جلد: يمكن نقش الجلود لإنشاء أنماط ونص مفصل, مما يجعلها شائعة للملحقات المخصصة, أكياس, والأحذية.

Choosing the Right Software
Popular Laser Engraving Software
يعد اختيار البرنامج المناسب أمرًا ضروريًا لإنشاء ملفات نقش بدقة وفعالة بالليزر. تشمل بعض خيارات البرامج الأكثر شعبية:
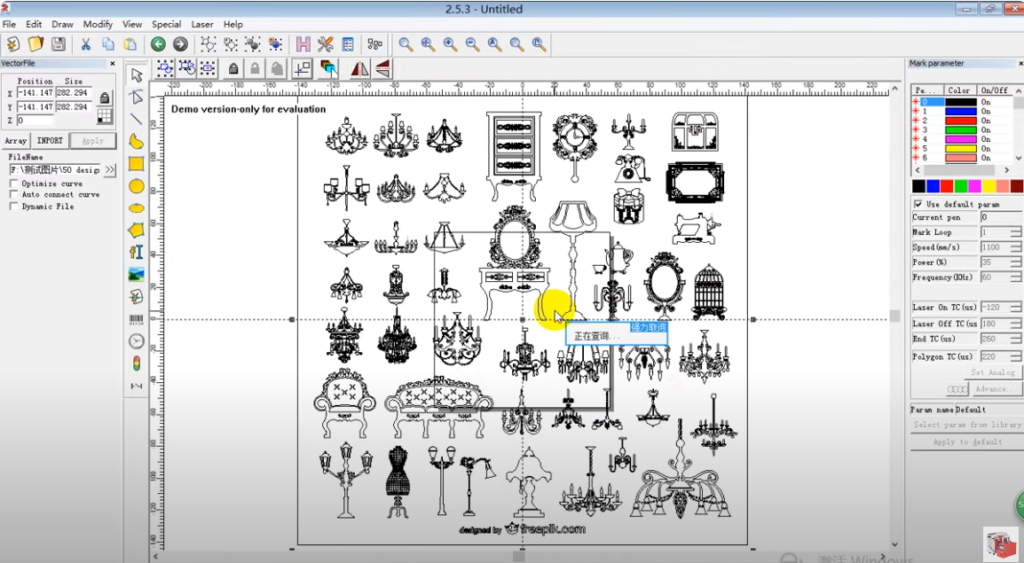
- لايت بيرن: برنامج قوي مصمم خصيصًا لنقش الليزر والقطع. إنه يوفر واجهة سهلة الاستخدام مع ميزات متقدمة مثل تتبع الصور, تعويض, وتحرير العقدة.
- برنامج كوريل درو: A popular vector graphics editor used by many professionals in the laser engraving industry. It provides robust design tools and is widely compatible with various laser machines.
- أدوبي المصور: Another industry-standard vector graphics editor, Adobe Illustrator is known for its precision and advanced design capabilities. It’s particularly useful for creating complex designs and detailed artwork.
- inkscape: An open-source vector graphics editor that offers a wide range of design tools. While it may not be as powerful as paid options like Illustrator, it’s a popular choice for hobbyists and those on a budget.
Features to Look For in Laser Design Software
When selecting software for laser engraving, consider the following features:
- Vector Editing: The ability to create and edit vector graphics is essential for laser engraving, لأنه يسمح بالتحكم الدقيق في التصميم.
- تتبع الصور: هذه الميزة تحول الصور النقطية (مثل jpegs أو pngs) في رسومات ناقلات, والتي هي أكثر ملاءمة لنقش الليزر.
- إدارة الطبقة: تتيح القدرة على العمل مع طبقات متعددة التصميمات الأكثر تعقيدًا وأسهل التحرير.
- تنسيقات ملفات متوافقة: تأكد من أن البرنامج يمكنه تصدير الملفات بتنسيقات متوافقة مع نقاش الليزر الخاص بك, مثل SVG, دكسف, أو الذكاء الاصطناعي.
- أدوات المحاكاة: تتضمن بعض البرامج أدوات لمحاكاة عملية النقش, مساعدتك في معاينة النتائج وإجراء التعديلات قبل النقش.
Software Comparisons
- Lightburn vs. برنامج كوريل درو: تم تصميم Lightburn لنقش الليزر, تقديم ميزات مصممة خصيصًا لهذا الغرض. برنامج كوريل درو, بينما أكثر للأغراض العامة, يوفر مجموعة واسعة من أدوات التصميم ولكن قد تتطلب إعدادًا إضافيًا للعمل مع نقش الليزر.
- Adobe Illustrator vs. inkscape: يعد Adobe Illustrator أكثر غشًا بالميزات ويوفر تكاملًا أفضل مع أدوات التصميم الأخرى, جعلها مثالية للمهنيين. inkscape, بينما أقل قوة, مجاني وكافي لمعظم المشاريع الهواة.
File Formats for Laser Engraving
Commonly Used File Formats
يمكن لتنسيق الملف الذي تختاره لمشروع نقش الليزر الخاص بك أن يؤثر بشكل كبير على جودة وسهولة عملية النقش. تشمل التنسيقات الشائعة الاستخدام:
- SVG (رسومات المتجهات قابلة للتطوير): تنسيق شائع لنقش الليزر بسبب قابلية التوسع ودعمه لرسومات المتجهات. تعد ملفات SVG مثالية للتصميمات التي تحتاج إلى تغيير حجمها دون فقدان الجودة.
- دكسف (تنسيق تبادل الرسم): يستخدم على نطاق واسع في CAD (تصميم بمساعدة الكمبيوتر) برمجة, تتوافق ملفات DXF مع العديد من نقاط الليزر وهي مثالية للرسومات الفنية والتصميمات المعقدة.
- منظمة العفو الدولية (أدوبي المصور): التنسيق الأصلي لـ Adobe Illustrator, ملفات AI ممتازة للحفاظ على عناصر التصميم التفصيلية ومعلومات الطبقة.
- بي دي إف (Portable Document Format): PDF files are versatile and can contain both vector and raster elements. They’re commonly used for sharing designs across different platforms.
Converting Files to Compatible Formats
If your design software doesn’t natively export files in a format compatible with your laser engraver, you’ll need to convert the files. Many vector editing programs offer export options to common formats like SVG or DXF. بالإضافة إلى ذلك, online converters can be used to change file formats, though care should be taken to ensure that the conversion process doesn’t degrade the quality of the design.
Raster vs. Vector Files: ماهو الفرق?
- Raster Files: Raster images are made up of pixels and are typically used for photographs or detailed images. Common raster formats include JPEG, PNG, و بي إم بي. ملفات النقطية ليست مثالية لنقش الليزر لأنها لا تتوسع بشكل جيد ويمكن أن تؤدي إلى فقدان الجودة عند تغيير حجمها.
- Vector Files: تتكون رسومات المتجهات من مسارات, وهي أوصاف رياضية للأشكال والخطوط. هذا يجعلها قابلة للتطوير بلا حدود دون فقدان الجودة. تفضل ملفات المتجهات إلى نقش الليزر لأنها تسمح بالتحكم الدقيق في التصميم وأسهل في التحرير.
Creating the Design
Setting Up Your Workspace in the Software
قبل أن تبدأ في التصميم, من المهم إعداد مساحة العمل الخاصة بك في البرنامج. وهذا يشمل:
- حجم قماش: اضبط حجم القماش الخاص بك لتتناسب مع أبعاد المواد التي ستقوم بنقاطها. هذا يضمن أن التصميم الخاص بك سوف يناسب بشكل صحيح على المواد.
- الوحدات: اختر الوحدات المناسبة (بوصة, ملليمتر, إلخ.) بناءً على متطلبات مشروعك وحفر الليزر.
- الشبكة والإرشادات: تمكين خطوط الشبكة وإعداد إرشادات للمساعدة في المحاذاة والتباعد في التصميم الخاص بك.
Creating Vector Designs
تعتبر تصميمات الموجهات مثالية لنقش الليزر لأنه يمكن تحجيمها دون فقدان الجودة. عند إنشاء تصميمات المتجهات:
- استخدم أداة القلم: تتيح لك أداة القلم إنشاء مسارات وأشكال دقيقة. إنه مفيد بشكل خاص لإنشاء تصميمات وشعارات مخصصة.
- تبسيط الأشكال: حافظ على تصميمك بسيط, خاصة إذا كنت تعمل مع مواد لها سعة تفاصيل محدودة, مثل الخشب أو الجلد.
- الجمع بين الأشكال: استخدم وظيفة الجمع أو الاتحاد لدمج أشكال متعددة في مسار واحد. هذا يضمن أن نقاش الليزر يعالج التصميم كخط واحد مستمر.
Working with Text: Fonts, Kerning, and Size Considerations
النص عنصر شائع في تصميمات نقش الليزر. لضمان نقش النص الخاص بك بشكل نظيف:
- اختر الخط الصحيح: استخدم خطًا مقروءًا ومناسبًا لحجم نقشك. تجنب الخطوط المعقدة بشكل مفرط للنص الصغير لأنها قد لا تنقص جيدًا.
- ضبط Kerning: يشير Kerning إلى المسافة بين الشخصيات. يمكن لضبط Kerning تحسين مظهر النص الخاص بك, خاصة عند النقش على الأسطح الصغيرة.
- النظر في الحجم: تأكد من أن حجم النص مناسب للمادة ومنطقة النقش. النص الصغرى قد لا ينقش بوضوح, في حين أن النص كبير جدًا قد يطغى على التصميم.
Importing and Tracing Images
إذا كنت تعمل مع صورة نقطية, ستحتاج إلى تتبعه لإنشاء إصدار متجه للنقش. تتضمن معظم برامج تصميم الليزر أداة تتبع تقوم تلقائيًا بتحويل الصور إلى مسارات المتجهات. عند التتبع:
- صور عالية الدقة: ابدأ بصورة عالية الدقة للتأكد من أن التتبع دقيق.
- تبسيط التصميم: تبسيط التصميم المتتبع عن طريق إزالة التفاصيل غير الضرورية وتجانس الحواف الخشنة. سيؤدي هذا إلى تحسين جودة النقش.
Adding Depth: Using Layers and Effects
الطبقات والتأثيرات يمكن أن تضيف العمق والتعقيد لتصميم نقشك. النظر في التقنيات التالية:
- إدارة الطبقة: استخدم طبقات متعددة لفصل عناصر مختلفة من التصميم الخاص بك. هذا يسمح بسهولة التحرير والمزيد من التحكم في عملية النقش.
- التظليل والتدرجات: على الرغم من أن التظليل والتدرجات يرتبطون بشكل أكثر شيوعًا بالصور النقطية, يمكن محاكاةها في تصميمات المتجهات باستخدام أعماق نقش مختلفة وأنماط الخطوط.
- الآثار: تطبيق تأثيرات مثل النقش أو المحاكاة النقش لمعاينة كيف سيبدو التصميم النهائي. يمكن أن يساعدك ذلك في إجراء تعديلات قبل النقش.
Preparing the File for Engraving
Setting Engraving Parameters (سرعة, قوة, تكرار)
قبل إرسال التصميم الخاص بك إلى نقاش الليزر, ستحتاج إلى تعيين معلمات النقش:
- سرعة: السرعة التي يتحرك بها رأس الليزر عبر المادة. عادة ما تؤدي السرعات الأبطأ إلى نقوش أعمق, في حين أن السرعات أسرع تنتج علامات أخف وزنا.
- قوة: شدة شعاع الليزر. ستعمل إعدادات الطاقة الأعلى على إزالة المزيد من المواد, خلق نقوش أعمق.
- تكرار: عدد نبضات الليزر في الثانية. يمكن أن يؤثر ضبط التردد على نعومة وتفاصيل النقش.
Adjusting Line Thickness for Engraving
يمكن أن يؤثر سماكة الخطوط في التصميم الخاص بك على النقش النهائي. قد تتطلب الخطوط الأكثر سمكًا تمريرات متعددة للنقش بالكامل, في حين أن الخطوط الرقيقة قد تكون أكثر ملاءمة للعمل التفصيلي. اضبط سمك الخط في برنامج التصميم الخاص بك لمطابقة النتيجة المطلوبة.
Applying Masks and Clipping Paths
Masks and clipping paths can be used to limit the engraving area or to create complex designs. على سبيل المثال:
- Masks: Apply a mask to prevent certain areas of the material from being engraved. This can be useful for creating multi-step engravings or for protecting delicate areas of the material.
- Clipping Paths: Use clipping paths to define the boundary of your design. This ensures that only the area within the path is engraved.
Simulating the Engraving Process in Software
Before engraving, use simulation tools in your software to preview the engraving process. This can help you identify potential issues, such as areas where the laser may overlap or where the design may not engrave as expected. Making adjustments based on the simulation can save time and material during the actual engraving.
File Optimization
Minimizing File Size without Losing Quality
يمكن للملفات الكبيرة إبطاء عملية النقش وتضع ضغطًا إضافيًا على نقاش الليزر الخاص بك. لتقليل حجم الملف:
- تبسيط المسارات: تقليل عدد العقد في مسارات المتجه الخاصة بك. يمكن القيام بذلك باستخدام أدوات تبسيط المسار في برنامج التصميم الخاص بك.
- إزالة العناصر غير الضرورية: حذف أي طبقات مخفية, مسارات غير مستخدمة, أو كائنات زائدة من التصميم الخاص بك.
- تحسين الصور النقطية: إذا كان التصميم الخاص بك يتضمن صورًا نقطية, قلل من دقة وحجمهم إلى الحد الأدنى اللازم للنقش.
Organizing Layers and Paths
من السهل العمل على ملف منظم جيد التنظيم وأقل عرضة للأخطاء. قبل تصدير ملفك:
- العناصر ذات الصلة بالمجموعة: تجميع العناصر ذات الصلة معًا يجعل من الأسهل تحريكها وتحريرها كوحدة واحدة.
- الطبقات والمسارات: Give descriptive names to layers and paths to make them easier to identify during the engraving process.
- Order Layers: Arrange layers in the correct order, with the elements that need to be engraved first at the bottom and those that should be engraved last at the top.
Checking for and Fixing Common Errors
Before engraving, check your file for common errors:
- Overlapping Lines: Overlapping lines can cause the laser to engrave the same area multiple times, leading to uneven engraving or damage to the material.
- Open Paths: Ensure that all paths are closed, as open paths may not engrave correctly.
- Duplicate Objects: Remove any duplicate objects that could cause unnecessary engraving.
Testing and Prototyping
Running a Test Engraving on Scrap Material
Before engraving your final piece, it’s important to run a test engraving on scrap material. This allows you to:
- Check the Quality: Ensure that the engraving depth, الوضوح, والتفاصيل تلبي توقعاتك.
- إعدادات الاختبار: تجربة بسرعة مختلفة, قوة, وإعدادات التردد للعثور على المزيج الأمثل للمادة الخاصة بك.
- تحديد القضايا: اكتشف أي مشكلات محتملة في التصميم, مثل الاختلال أو العلامات غير المرغوب فيها.
Analyzing the Test Results
بعد إجراء اختبار نقش, تحليل النتائج بعناية:
- عمق النقش: تأكد من أن عمق النقش متسق ومناسب للمادة.
- الوضوح والتفاصيل: تأكد من أن التفاصيل الدقيقة محفورة بشكل واضح وأنه لا توجد مناطق ضبابية أو غير واضحة.
- الاستجابة المادية: لاحظ كيف تستجيب المادة للليزر, تبحث عن أي علامات الحرق, تزييف, أو تلون.
Making Adjustments Based on Test Outcomes
بناءً على نتائج الاختبار, قم بإجراء أي تعديلات ضرورية على التصميم أو الإعدادات الخاصة بك. هذا قد يشمل:
- ضبط السرعة والقوة: قم بضبط إعدادات السرعة والطاقة لتحقيق عمق النقش والوضوح المطلوب.
- تعديل التصميم: تبسيط أو تعديل التصميم لتحسين جودة النقش, خاصة إذا كانت المادة لا تستجيب كما هو متوقع.
- تغيير المادة: إذا كانت المادة غير مناسبة لتصميمك, فكر في التبديل إلى نوع مختلف قد ينقص بشكل أكثر فعالية.
التقنيات المتقدمة
Multi-Layer Engravings
تتضمن النقوش متعددة الطبقات إنشاء تصميمات بأعماق أو طبقات مختلفة, إضافة التعقيد والاهتمام البصري. لإنشاء نقوش متعددة الطبقات:
- طبقات منفصلة: تعيين عناصر مختلفة من التصميم الخاص بك لفصل الطبقات, كل مع عمق النقش الخاص به.
- استخدام الأقنعة: تطبيق الأقنعة لحماية مناطق معينة أثناء نقش الآخرين, السماح بالتحكم الدقيق في العمق والطبقة.
- تجربة المواد: قد تستجيب مواد مختلفة بشكل مختلف عن نقش متعدد الطبقات, لذا فإن الاختبار أمر بالغ الأهمية.
Using Shading and Gradients
يمكن أن يضيف التظليل والتدرجات عمقًا وبعد إلى نقوشك. في حين أن هذه التأثيرات ترتبط عادة بالصور النقطية, يمكن محاكاةها في تصميمات المتجهات:
- أنماط النصف: قم بإنشاء أنماط Halftone باستخدام نقاط ذات أحجام متفاوتة لمحاكاة التظليل.
- يملأ التدرج: استخدم تعبئة التدرج لإنشاء انتقالات سلسة بين المناطق الخفيفة والظلام في التصميم الخاص بك.
- ضبط إعدادات الليزر: صقل قوة الليزر وسرعته لإنشاء اختلافات خفية في عمق النقش الذي يحاكي التظليل.
Combining Engraving with Cutting
يمكن للعديد من نقوش الليزر نقشًا وقطع المواد. يمكن أن يؤدي الجمع بين هاتين العمليتين إلى إنشاء تصميمات معقدة وقواطع مفصلة:
- تصميم للعملية المزدوجة: خطط لتصميمك لتشمل كل من عناصر النقش والقطع. على سبيل المثال, قد تنقش نمطًا على سطح قطعة من الخشب, ثم قطع شكل حول النقش.
- تعيين معلمات مختلفة: استخدم سرعة مختلفة, قوة, وإعدادات التردد للنقش والقطع لضمان نتائج نظيفة ودقيقة.
- محاذاة بعناية: تأكد من أن مسارات النقش والقطع محاذاة مثالية لتجنب مشاكل الاختلال.
Creating 3D Engraving Files
3يتضمن نقش D إنشاء تصميمات ذات أعماق متفاوتة لإنتاج تأثير ثلاثي الأبعاد. هذا يمكن تحقيقه بواسطة:
- طبقة: قم بإنشاء سلسلة من الطبقات ذات أعماق مختلفة لإنشاء تأثير ثلاثي الأبعاد.
- باستخدام رمادي: تحويل التصميم الخاص بك إلى رمادي, حيث تتوافق ظلال مختلفة مع أعماق نقش مختلفة.
- الاختبار والتكرير: 3D نقش معقد وقد يتطلب إجراءات اختبار متعددة لإتقان العمق والتفاصيل.
Tips for Different Materials
خشب: Grain Direction, Burn Depth, and Staining
عند نقش الخشب, النظر في ما يلي:
- Grain Direction: قم بمحاذاة التصميم الخاص بك مع الحبوب الخشبية لنقش أنظف. يمكن أن يسبب النقش ضد الحبوب نتائج غير متساوية.
- Burn Depth: اضبط قوة الليزر للتحكم في عمق الحرق. قد تكون الحروق الأعمق ضرورية للأخشاب الأكثر صعوبة.
- تلطيخ: بعد النقش, يمكن أن يؤدي تلطيخ الخشب إلى تعزيز التباين وجعل التصميم يبرز.
معدن: Marking vs. نقش, الطلاءات, and Paint Fills
يمثل النقش على المعادن تحديات فريدة:
- Marking vs. نقش: العلامات هي عملية على مستوى السطح, بينما يزيل النقش المواد. اختر الطريقة المناسبة بناءً على النتيجة المطلوبة.
- الطلاءات: يمكن أن يساعد تطبيق طلاء على المعدن قبل النقش في تحقيق الانتهاء من أنظف وتقليل الانعكاسات.
- ملء الطلاء: بعد النقش, املأ المناطق المحفورة بالطلاء لإضافة اللون والتباين.
أكريليك: Edge Effects, Surface Treatments, and Light Diffusion
الأكريليك تحظى بشعبية كبيرة لوضوحها وتنوعها:
- Edge Effects: يمكن أن يؤدي نقش حواف الأكريليك إلى خلق تأثير متجمد, إضافة الاهتمام البصري.
- Surface Treatments: النظر في تطبيق المعالجة السطحية لحماية المنطقة المحفورة من الخدوش واللطخات.
- انتشار الضوء: يمكن استخدام الأكريليك المحفور مع مصابيح LED لإنشاء علامات أو شاشات مضاءة.
زجاج: التحكم في العمق, Frosted Effects, and Paint Fills
يتطلب نقش الزجاج التحكم الدقيق:
- التحكم في العمق: استخدم إعدادات دقيقة للتحكم في عمق النقش, لأن الزجاج يمكن أن يكسر بسهولة أو يتحطم.
- Frosted Effects: قم بإنشاء مظهر متجمد عن طريق نقش السطح بخفة. هذا مثالي للعناصر الزجاجية الزخرفية.
- ملء الطلاء: بعد النقش, املأ المناطق المحفورة بالطلاء لإضافة لون وجعل التصميم أكثر وضوحًا.
Saving and Exporting the Final File
Saving the File in the Correct Format
تأكد من حفظ ملفك بتنسيق متوافق مع نقاش الليزر الخاص بك. تشمل التنسيقات الشائعة SVG, دكسف, ولديك. تحقق من إعدادات الملف لضمان مطابقة متطلبات الليزر الخاصة بك.
Organizing Files for Production
تنظيم ملفاتك بطريقة منطقية لتبسيط الإنتاج:
- تسمية الملف: استخدم أسماء الملفات الوصفية التي تتضمن تفاصيل مثل نوع المواد, نسخة التصميم, والتاريخ.
- هيكل المجلد: قم بإنشاء بنية مجلد تجمع الملفات حسب المشروع, مادة, أو العميل.
- النسخ الاحتياطية: احتياطي بانتظام ملفاتك لمنع فقدان البيانات.
Archiving and Version Control
الحفاظ على نظام لأرشفة الملفات القديمة وإدارة إصدارات مختلفة من تصميماتك:
- السيطرة على الإصدار: احفظ إصدارات جديدة من ملفك أثناء إجراء تغييرات, باستخدام اتفاقية تسمية متسقة (على سبيل المثال, "Design_v2").
- أرشفة: أرشيف الملفات القديمة التي لم تعد قيد الاستخدام ولكن قد تكون هناك حاجة إليها في المستقبل. فكر في استخدام التخزين السحابي لسهولة الوصول والاسترجاع.
استكشاف المشكلات الشائعة وإصلاحها
عمق نقش غير متناسق
يمكن أن يكون سبب عمق النقش غير المتناسق:
- سطح المادة غير المتكافئ: تأكد من أن المادة مسطحة ومثبتة بشكل صحيح قبل النقش.
- إعدادات الليزر: تحقق من إعدادات السرعة والطاقة لضمان أن تكون متسقة عبر التصميم.
- نظافة العدسة: قم بتنظيف عدسة الليزر بانتظام لمنع الأوساخ والحطام من التأثير على النقش.
Burn Marks and Scorching
يمكن تقليل علامات الحرق والحروق:
- خفض إعدادات الطاقة: قلل من قوة الليزر لتجنب حرق المواد.
- زيادة السرعة: قم بزيادة سرعة النقش لتقليل مقدار الوقت الذي ينفقه الليزر في كل منطقة.
- باستخدام الطلاء الواقي: ضع طبقة واقية على المادة قبل النقش, ثم قم بإزالته بعد ذلك للكشف عن سطح نظيف.
Misalignment Issues
يمكن أن يحدث اختلال عندما لا يكون التصميم محاذاة بشكل صحيح مع المادة:
- تحقق من الإعداد: تأكد من وضع المادة بشكل صحيح على سرير النقش.
- استخدام أدوات المحاذاة: لدى العديد من نقاشات الليزر أدوات محاذاة مدمجة يمكن أن تساعد في ضمان وضع دقيق.
- قم بإجراء تمريرة اختبار: قم بتشغيل تمريرة اختبار منخفض الطاقة للتحقق من المحاذاة قبل النقش.
Poor Image Quality or Blurriness
يمكن أن يكون سبب جودة الصورة رديئة:
- ملفات منخفضة الدقة: ابدأ بصور عالية الدقة لضمان نقش واضح.
- التركيز غير الصحيح: تأكد من أن الليزر يركز بشكل صحيح على المادة.
- إعدادات النقطية: اضبط الإعدادات النقطية لتحسين وضوح وتفاصيل النقش.
Best Practices for Laser Engraving Files
Maintaining a Clean Workspace
مساحة عمل نظيفة تضمن نتائج نقش أفضل:
- إزالة الحطام: قم بتنظيف السرير النقش بانتظام لإزالة الغبار, حطام, وبقايا المواد.
- تنظيم الأدوات: الحفاظ على أدواتك وموادك منظمة لسهولة الوصول خلال عملية النقش.
- تهوية: تأكد من التهوية المناسبة في مساحة العمل الخاصة بك لإزالة الأبخرة والدخان المتولدة أثناء النقش.
Regularly Updating Software and Firmware
حافظ على محرك الليزر والبرامج الخاصة بك حتى الآن:
- تحديثات البرامج: تحقق بانتظام من تحديثات البرامج التي قد تتضمن ميزات جديدة, إصلاحات الأخطاء, أو تحسينات الأداء.
- تحديثات البرامج الثابتة: قم بتحديث البرامج الثابتة على نقاش الليزر لضمان التوافق مع أحدث البرامج ولتحسين الوظائف.
- إعدادات النسخ الاحتياطي: قبل التحديث, قم بعمل نسخة احتياطية من الإعدادات وتفضيلاتك لتجنب فقدانها أثناء عملية التحديث.
الاحتفاظ بمكتبة من الملفات والإعدادات المختبرة
الحفاظ على مكتبة من الملفات المختبرة وإعدادات النقش:
- تصميمات تم اختبارها: حفظ نسخ من التصميمات التي تم نقشها بنجاح, جنبا إلى جنب مع الإعدادات المستخدمة.
- إعدادات المواد: احتفظ بسجل للسرعة المثلى, قوة, وإعدادات التردد لكل مادة تعمل معها.
- دليل مرجعي: قم بإنشاء دليل مرجعي يسرد المشكلات والحلول الشائعة, بناء على تجربتك.


