Eine warnende Geschichte: The Laser Engraving Mishap
Imagine this: You’ve just completed a complex design for a custom wooden sign, ready to be laser engraved. You carefully adjust your settings, excited to see the final product. But as the laser finishes its work, you realize something is terribly wrong. Instead of the clean, crisp engraving you expected, the design appears inverted—what should be raised is recessed, and what should be recessed is raised. The intricate details are lost in the confusion, and your once-promising project now feels like a disaster.
This story might sound all too familiar if you’ve worked with Laser-Gravur, especially when dealing with complex depth designs. Mistakes like this are more common than you might think, and they can be incredibly frustrating, especially when you’re on a deadline or using expensive materials.
Why Reversing Depth Design is a Common Challenge
Reversing a depth design isn’t just about fixing mistakes; it’s about understanding the intricacies of laser engraving to achieve the precise effect you want. Whether you’re a hobbyist making personalized gifts or a professional creating detailed engravings, mastering this technique is essential.
In diesem Artikel, we’ll guide you through the entire process, from understanding why these mistakes happen to step-by-step instructions on how to reverse a depth design. By the end, you’ll not only know how to correct these errors but also how to avoid them in the first place. This knowledge will empower you to take your laser engraving projects to the next level, ensuring that every design turns out exactly as you envisioned.
1. Understanding Depth Design in Laser Engraving
1.1 The Basics of Laser Engraving
Laser engraving is a precise process where a focused laser beam removes material from a surface to create designs, Muster, oder Text. Depth in laser engraving is controlled by adjusting three key factors: Laserleistung, Geschwindigkeit, und Fokus.
- Laserleistung: Higher power burns deeper into the material.
- Geschwindigkeit: Slower speed allows the laser to engrave deeper.
- Fokus: The laser’s focal point determines the sharpness and depth.
Depth Design involves planning the different levels of engraving, which can range from shallow etchings to deep carvings. This design dictates how the final engraved product will look, whether it’s a simple monogram or a complex 3D image.
1.2 Common Mistakes with Depth Design
Mistakes in depth design are frequent, especially among beginners. One common error is unintentional depth reversal, where the engraved areas are inverted. Zum Beispiel, elements meant to be recessed may appear raised, disrupting the design’s visual flow.
This reversal can lead to:
- Detailverlust: Fine details might be lost or obscured.
- Inconsistent Textures: Unwanted variations in depth create uneven surfaces.
- Miscommunication of Intent: The final product may convey a completely different message or visual appeal.
Understanding these pitfalls is crucial for anyone looking to master laser engraving, as avoiding them ensures the final product matches your vision.
2. Why Would You Need to Reverse a Depth Design?
2.1 Artistic and Practical Applications
Reversing a depth design can be a powerful tool in both artistic and practical applications. Zum Beispiel, erstellen embossing effects on materials like leather or paper requires a reversed depth design, where the background is engraved, leaving the design raised. This technique is also used in making stamps where the design needs to be raised above the background to create an impression.
In practical applications, reversing the depth design is essential for producing molds or textured surfaces. By engraving the negative space, molds can be created for casting or pressing materials, allowing for precise replication of designs. This method is commonly used in industries like jewelry making, where intricate designs need to be repeatedly reproduced.
2.2 Mistakes and Fixes
Mistakes in depth design often occur due to oversight or misjudgment in the initial setup. Zum Beispiel, a design intended to have raised text might mistakenly be engraved as recessed, completely altering the intended look. In solchen Fällen, reversing the depth can salvage the project by flipping the design in the software and re-engraving the material.
Real-world examples of successful reversals include projects where the initial design didn’t turn out as expected, such as a logo that lost its clarity due to incorrect depth settings. By reversing the depth, the design was re-engraved, restoring the clarity and making the project a success. This technique has saved countless projects from being scrapped, proving its value in both creative and commercial laser engraving endeavors.
3. Step-by-Step Guide to Reversing a Depth Design
3.1 Using Design Software
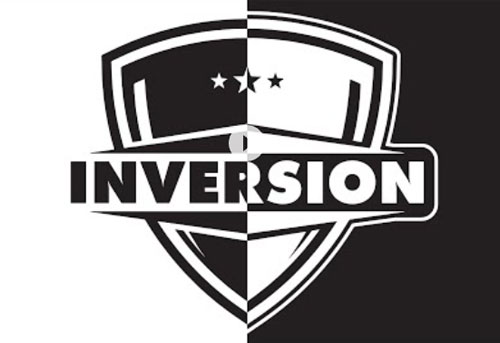
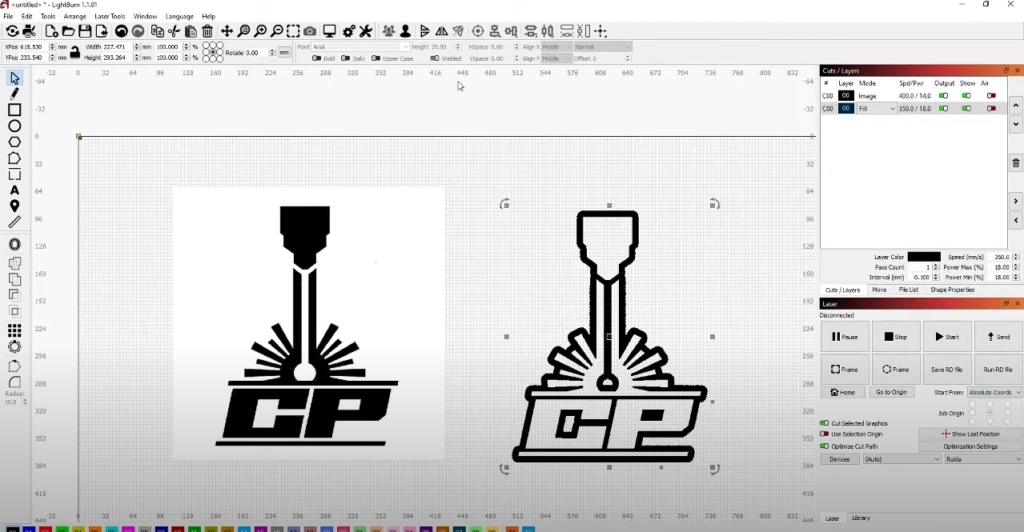
To reverse a depth design, start with popular Lasergravursoftware wie LightBurn oder EzCad. Jedes Programm bietet Werkzeuge zum Invertieren von Farben, unerlässlich für die Umkehrtiefe. Zum Beispiel, In EzCad, Wählen Sie das Design aus, navigieren Sie zu “Bearbeiten” > “Farben bearbeiten” > “Farben umkehren.” Diese Einstellung kehrt die Tiefe um, Dadurch werden vertiefte Bereiche nun erhöht.
3.2 Manuelle Techniken
Für einen praxisorientierten Ansatz, manuell anpassen Graustufenwerte oder Ebenen in Ihrer Designsoftware. Durch Veränderung dieser Farbtöne, Sie steuern die Tiefe der Gravur. Dunklere Farbtöne führen zu einer tieferen Gravur, also durch Umkehren dieser Farbtöne, Sie kehren effektiv die Tiefe des Designs um.
3.3 Anpassungen der Lasereinstellungen
Nach Umkehrung des Designs in der Software, Feinabstimmung Ihrer Lasergravierer Einstellungen. Anpassen Leistung (Höhere Leistung für tiefere Gravuren), Geschwindigkeit (langsamere Geschwindigkeit für tiefere Gravuren), Und Fokus für optimale Ergebnisse. Immer weiter testen Schrottmaterial Stellen Sie zunächst sicher, dass die Einstellungen den gewünschten umgekehrten Tiefeneffekt erzeugen, bevor Sie mit der endgültigen Gravur fortfahren.
4. Advanced Techniques and Considerations
4.1 Layering Techniques
Creating Depth with Layers:
One of the most powerful techniques in laser engraving is the use of multiple layers within your design software. By assigning different depths to various layers, you can create complex designs that are easy to manipulate, even if you need to reverse the depth.
Step-by-Step Layering Process:
- Create Separate Layers: Start by creating different layers for each section of your design. Each layer can represent a different depth level.
- Assign Depths: Using the software’s tools, assign specific grayscale values to each layer. Darker layers will be engraved more deeply.
- Reverse with Ease: If you need to reverse the design, simply invert the grayscale values for each layer. This allows for seamless adjustment without redoing the entire design.
Fallstudien:
Consider a project involving a three-dimensional map engraving. By layering the contours of the map, each representing a different altitude, you can reverse the depths to create an embossed effect rather than a recessed one. This approach is not only effective but also enhances the overall visual impact of the design.
4.2 Combining Depth Reversal with Other Effects
Dithering and Gradient Fills:
Depth reversal can be combined with effects like dithering oder gradient fills to create visually stunning designs. Dithering, zum Beispiel, can add texture, making the reversed depth appear more natural and detailed.
Creating Textures:
Gradient fills can help in achieving a smooth transition between different depths, which is especially useful when reversing designs like topographical maps oder artistic engravings. By carefully manipulating these effects, you can add an additional layer of complexity and interest to your project.
Practical Examples:
Imagine creating a laser-engraved portrait. By combining depth reversal with gradient fills, you can produce a piece where the subject appears to emerge from the background. This not only adds depth but also makes the engraving more lifelike.
4.3 Beheben häufiger Probleme
Ungleichmäßige Gravur:
A common issue when reversing depth designs is uneven engraving. This can result from inconsistent laser power or speed. To combat this:
- Check your laser settings: Ensure that the power and speed are uniform across the entire design.
- Use consistent materials: Variations in material thickness or composition can lead to uneven engraving.
Detailverlust:
Detail loss is another problem that can arise, particularly in intricate designs. To mitigate this:
- Increase the resolution: Higher resolution settings in your software can preserve fine details.
- Optimize your design: Simplify overly complex areas or reduce the depth in these regions.
Material Burnout:
Material burnout occurs when the laser is too powerful for the material, leading to unwanted charring or burning. Um dies zu vermeiden:
- Laserleistung einstellen: Lower the laser’s power settings when working with sensitive materials.
- Test on scraps: Always test the settings on a scrap piece of material before engraving the final product.
Real-World Troubleshooting:
Zum Beispiel, a project involving a delicate paper engraving might initially suffer from material burnout. By adjusting the laser power and running tests, you can achieve the desired depth without damaging the material.
5. Case Studies and Examples
Case Studies of Depth Reversal:
- Custom Stamp Creation:
A detailed walk-through of creating custom stamps using depth reversal. Discuss how the technique allows for sharp, raised lettering that’s perfect for inking.- Step-by-Step Process:
- Depth reversal and adjustment in EzCad.
- Testing and final engraving on rubber material.
- Visual Aids:
Include before-and-after images showcasing the difference depth reversal made. - Decorative Wooden Panels:
Explore a project where depth reversal was used to create intricate designs on wooden panels for home décor.- Designkomplexität:
Discuss how layering and depth reversal brought out the intricate details in the woodgrain, enhancing the final product. - Materialhandhabung:
Offer insights on choosing the right type of wood and how depth settings affected the engraving quality.
- Designkomplexität:
Learning from Mistakes:
- Real-Life Example:
A hobbyist’s attempt at engraving a multi-layered design on acrylic that initially failed due to improper depth setting.- Lösung:
Reversing the design layers and adjusting laser settings salvaged the project, resulting in a stunning, klare Gravur.
- Lösung:
6. User FAQs
1. How can I avoid unintentional depth reversal in my designs?
- Answer: Start by double-checking your design in software like Lightburn or EzCad. Benutzen Sie die “Invert Colors” function to preview the design and ensure the depth is correct before engraving.
2. What materials are most challenging when reversing depth designs?
- Answer: Materials like acrylic and thin woods can be tricky due to their sensitivity to laser power and speed. It’s crucial to adjust settings precisely and test on scrap pieces.
3. Are there any tips for reversing depth in grayscale images?
- Answer: Ja, adjust the grayscale levels in your design software so that darker shades are less deep, die Tiefe effektiv umkehren. Testen Sie immer an einem ähnlichen Material, bevor Sie die endgültige Entscheidung treffen.
4. Was ist der beste Weg, ein Design zu korrigieren, nachdem mit der Gravur bereits begonnen wurde??
- Answer: Wenn Sie den Fehler frühzeitig erkennen, Unterbrechen Sie die Gravur und ändern Sie das Design in Ihrer Software. Wenn die Gravur abgeschlossen ist, Erwägen Sie die Erstellung einer neuen Ebene oder eines neuen Designelements, um den Fehler zu überdecken, oder überarbeiten Sie das Design mit Schwerpunkt auf der umgekehrten Tiefe.
5. Wie kann ich eine gleichmäßige Tiefe über verschiedene Materialien hinweg sicherstellen??
- Answer: Konsistenz entsteht durch das Verständnis der Reaktion jedes Materials auf Lasereinstellungen. Führen Sie ein Protokoll der für verschiedene Materialien verwendeten Einstellungen und passen Sie diese entsprechend der Dicke an, Dichte, und die Reaktion des Materials auf den Laser.
6. Kann ich die Tiefe in einem bereits gravierten Stück umkehren??
- Answer: Es ist schwierig, die Tiefe in einem bereits gravierten Stück umzukehren, Sie können jedoch versuchen, eine neue Designebene über der vorhandenen Gravur hinzuzufügen, um einen neuen Effekt zu erzielen. Jedoch, Dadurch wird der ursprüngliche Fehler möglicherweise nicht vollständig behoben.


