Introduksjon
Laser engraving is a highly promising process when it comes to bringing your ideas to the table. It empowers you to devise artistic and versatile solutions as a designer or a producer. I løpet av årene, people have been unfamiliar with the advantages of laser engraving, creating multiple lags for the artists. For this reason, there is a dire need to unpack the benefits of this process and discuss its phenomenon for deep understanding through this tutorial!

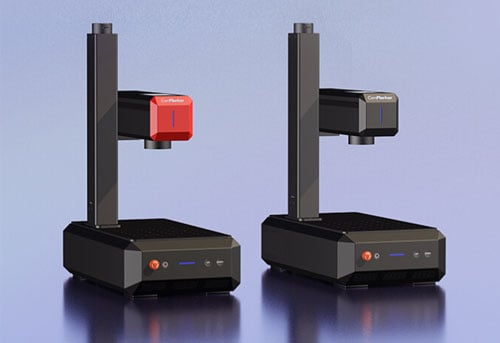
ComMarker B4 60W JPT MOPA Fiber Laser Markeringsmaskin
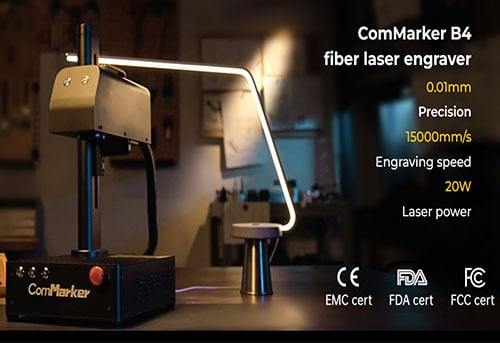
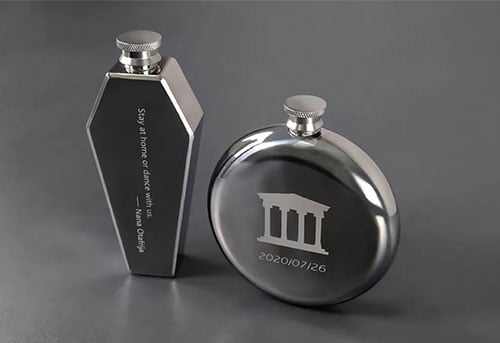
Bærbar & Rimelig: B4 MOPA 60W Fiber Laser Marking Machine veier kun 22 kg; kompakt størrelse innenfor 336*555*635mm. Elektrisk løft: Innebygd skjult løftemotor for presis fokusering. Fargemerking & Super skjæreevne: Kan fargegravere på rustfritt stål, svart og hvitt på aluminium, og kutte metaller opptil 2 mm tykke med 0,01 mm nøyaktighet. Romslig…
Overview of the Video Content
This detailed tutorial consists of all the phases of laser engraving so that beginners can understand it better. We are going to discuss why laser engraving has gained this much hype over the years and what makes it so special.
Steg 1: Initial Setup and Connection

The first step is to install the Mopa Machine and EzCad for Markør properly. Connect it with a laptop or computer. Check thoroughly whether the machine and all the components are attached and working or not. Last-minute checking if the correction file is imported and review ensure a smooth and flawless engraving process.
Steg 2: Markør and Interface

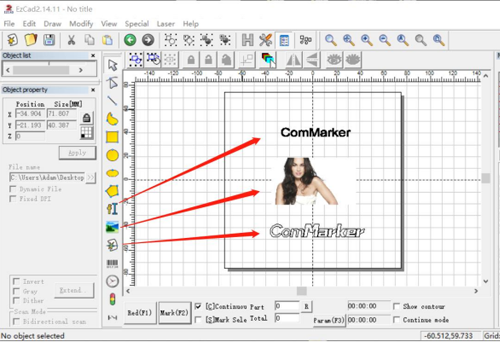
With Commarker, you get access to its supervising software. The reason behind using software is to make using this engraver more efficient and fun. Modern lasergraver now can work together with different designing tools that assist artists with engraving. The intuitive interfaces of this software allow you to handle the engraver with ease and enhance the quality of the designs.
Steg 3: Materialforberedelse

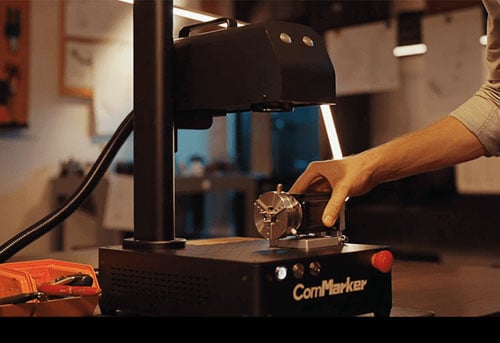
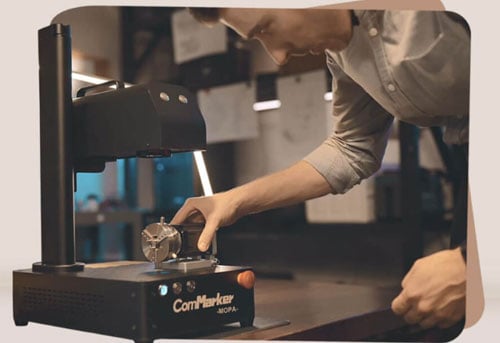
After setting up the machine, move on to the next step of loading the substance and material for engraving. Place all the material on the platform of the Mopa machine. Make sure that all materials are aligned correctly, then secure them with tight clamps to avoid any faults and errors during engraving if necessary
Steg 4: Selecting the Engraving Tool
It is crucial to select an appropriate stylus or engraving tool like MOPA galvo machine. In order to create a high-quality and precise engraving, ensure the stylus is suitable and compatible with the material and Mopa Machine.

Steg 5: Choosing the Color
The next phase consists of choosing an appropriate color for the different parts in engraving task. Pick the color according to the testing result, it’s crucial to select the color that goes well with the requirements of the project.
Steg 6: Designing the Project
Designing is what makes your project stand out from others. It reflects your taste and view which is why it is a crucial step that needs precision and creativity. If you are making a new project design or utilizing the premade layout, see for yourself that it must be compatible with the material and the resolution of the Mopa machine. According to the corresponding parameters of the selected color (hastighet, makt, pulse width, Frekvens, interval, antall passeringer), fill the corresponding area. Ensure that the parameters of the corresponding color are completely consistent with the parameters of the corresponding color in the test file.
Steg 7: Uploading and Adjusting the Design
This efficient software enables you to see and make adjustments in the settings of the engraving like power, resolution, and speed as per your project’s requirements. Change the size and location to fit the material
Steg 8: Starte graveringsprosessen
At this point, you have everything you need for engraving. Now just press the button “Engrave” to start the process of engraving. The machine automatically selects the parameters for different colors and design as per the input and creates the design you want.
Steg 9: Inspecting the Final Results
The last but most important step is the final inspection. Analyse av prosjektet til slutt sikrer designen, farge, og gravering gjøres ordentlig. Det lar deg også se etter feil på forhånd for å unngå fremtidige uønskede hendelser. Ikke bekymre deg hvis det mislykkes, Gjennomgå graveringsprosessen og sjekk området der gale parametere ble brukt. Gjennom sammenligning, Årsaken til feilen kan avklares og forbedres i den påfølgende prosessen.
Sikkerhetsforholdsregler
En annen viktig ting å vurdere er din sikkerhet. Lasergravering er morsomt til du beskytter deg mot bivirkninger. En viktig ulempe med lasergravering er giftige utslipp. Derfor, du må jobbe med prosjektene dine i en åpen, tilstrekkelig godt ventilert rom. Også, Du bør bruke en avtrekksavtrekk som er i stand til å trekke ut støvet og røyke bort.

ComMarker røykavsug-100W
BØRSTELØS MOTOR Lav støy og høy hastighet ANBEFALES HVIS DU ARBEID RUNDT RØYK OG RØYK! 3-Stage Filter |
Feilsøking og vedlikehold
Gravere kan gjennomgå potensielle skader med tiden, Noe som kan skade ytelsen deres. For å lagre graver fra dette, du må ta vare på det. Noen brukere må lære om graverne’ Feilsøking og mekanisk vedlikehold av programvare. Dette koster dem mye omarbeid og erstatningsutgifter. Derfor, Du må behandle graverens problemer i tide for å lage feilfrie design og inntrykk.
Ytterligere tips og triks for lasergravering
Under, Du finner flere tips for å bruke en gravering uten problemer, som vil hjelpe deg å få inntrykkene dine til å skille seg ut!
- Eksperimenter med frekvens og puls vittholdige innstillinger: Den beste delen om Mopa lasergraver er det et bredt spekter av frekvens og pulsbredde. Hvorfor? Fordi du kan kontrollere dem med disse funksjonene for å få designene dine til å skille seg ut og fargelegge gravering. Before working with new materials, it is hightly recommended to perform grid testing to ensure you find the right power, hastighet, Frekvens, and interval for the material
- Understand Material Responses: It is evident that the properties and nature of different materials respond uniquely to laser engraving.Therefore, you must be prepared to experience this response since you want to avoid getting shocked if something goes wrong. It will be better to learn about the properties of the material you are choosing through the internet and see how it reacts to the engravers. It will help you come up with seamless engraving each time.
- Regular Practice and Experimentation: Don’t underestimate the power of consistent practice to get friends with your engraver. Ellers vil du ikke kunne bruke den til utfordrende og intrikate design når det er nødvendig. Dette kan treffe selvtilliten din, Og du kan gi opp gravering ganske snart. For å unngå alt dette, Se flere videoer på nettet og se hvordan forskjellige mennesker bruker gravere per stil og hvordan du kan lære av dem.
- Lær av hvert prosjekt: Vi gjør alle feil, og graveringseksperter, også, en gang gjort flere feil. derimot, Du bør slutte hvis du ikke kan oppnå en bestemt graveringsdesign. Du bør notere feilene dine og se hva som gikk galt. Da, Du kan jobbe med det før du hopper på neste prosjekt. Slik mestrer du graverens innstillinger, som hastigheten, kraft og intervall, som er avgjørende for prosjektene dine.
- Vær forsiktig med tynne materialer: Test med lav effekt for å forhindre at materialet blir svidd eller deformert av varme
Konklusjon
Totalt sett, Mopaen fiber lasergraver Maskin krever en rekke trinn for en vellykket graveringsprosess. Disse trinnene inkluderer maskinoppsettet, Velge riktig farge i henhold til netttestresultatet, endre innstillingene, etsing, og endelig kvalitet og presisjonsinspeksjon. Hvert eneste trinn er like viktig for et vellykket, høy kvalitet, og presis sluttgravert produkt.
Her går du med den detaljerte opplæringen angående lasergravere. Forhåpentligvis, Du er klar over denne prosessen nå siden retningslinjene våre hjelper deg med å overvinne frykten for å bruke lasergravering for første gang. Vær så kreativ som du vil med graveren din, Men i mellomtiden, Sørg for forholdsregler, også!
Det er på tide å vise ditt sanne graveringspotensial med en spektakulær commarker -lasergraver. Fortsett, do experiments, and bring your imagination into reality today! Feel free to give us feedback once you use this fantastic engraver. Så, it can empower others around you to give it a shot and make masterpieces out of their imagination right away!
Video tutorial: