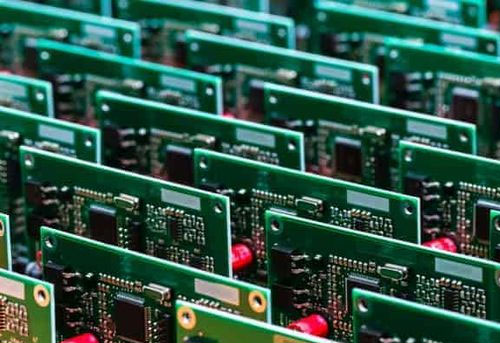
Gravação de PCB com gravador a laser de fibra envolve o uso de tecnologia laser de alta precisão para gravar, corte, e marque as várias camadas e componentes de uma placa de circuito impresso. Este método substitui os processos mecânicos e químicos tradicionais, fornecendo um limpador, mais preciso, e alternativa mais rápida.

Vantagens de usar um gravador a laser de fibra para gravação de PCB
Alta Precisão e Exatidão: Gravador a laser de fibra pode obter detalhes extremamente finos, o que é crucial para os intrincados padrões e conexões em um PCB. Esta precisão garante o desempenho confiável do produto eletrônico final.
Eficiência e Velocidade: O corte a laser é significativamente mais rápido que os métodos tradicionais, reduzindo o tempo de produção. A tecnologia galvo de alta velocidade em lasers de fibra direciona rapidamente o feixe de laser, permitindo processamento rápido.
Versatilidade: O gravador a laser de fibra pode funcionar com vários materiais de PCB, incluindo FR4, PCBs à base de alumínio, e laminados revestidos de cobre. Esta versatilidade os torna adequados para uma ampla gama de aplicações.
Desperdício mínimo de material: A precisão da gravação a laser de fibra reduz o desperdício de material, que é economicamente benéfico e ambientalmente amigável. Também produz menos resíduos e detritos em comparação com métodos de corte mecânico.
Processo sem contato: A gravação a laser é um processo sem contato, o que significa que não há desgaste físico na ferramenta ou no material do PCB. Isto resulta em custos de manutenção mais baixos e menos risco de danificar componentes delicados.

Principais recursos dos gravadores a laser de fibra para gravação de PCB
Integração avançada de software: Gravadores a laser de fibra usados para gravação de PCB geralmente vêm com software que suporta vários formatos de design e permite controle preciso sobre o processo de gravação. Softwares como LightBurn e EZCAD2 são comumente usados.
Galvanômetro de alta velocidade: Este componente garante que o feixe de laser seja direcionado com precisão para a PCB em altas velocidades, mantendo a precisão mesmo com projetos complexos.
Tecnologia de foco automático: Gravadores avançados a laser de fibra incluem sistemas de foco automático que ajustam o foco do laser com base na espessura do material e nas variações de superfície, garantindo qualidade de gravação consistente.
Sistemas de refrigeração: Sistemas de resfriamento eficientes são cruciais para manter o desempenho ideal da gravadora a laser, evitando superaquecimento, e garantindo operação contínua.

Aplicações de gravação de PCB com gravadores a laser de fibra
Prototipagem: Gravadores a laser de fibra permitem prototipagem rápida de PCBs, permitindo que os designers iterem e testem rapidamente seus projetos.
Produção em pequenos lotes: Para startups e pequenas empresas, gravadores a laser de fibra fornecem uma solução acessível para a produção de pequenos lotes de PCBs sem a necessidade de ferramentas caras.
Costumização: PCBs personalizados para aplicações ou projetos específicos podem ser facilmente produzidos com gravação a laser de fibra, oferecendo flexibilidade em design e funcionalidade.
Reparo e Retrabalho: Gravadores a laser de fibra podem ser usados para modificar PCBs existentes, como adicionar novos traços ou remover seções danificadas, facilitando reparos e modificações.

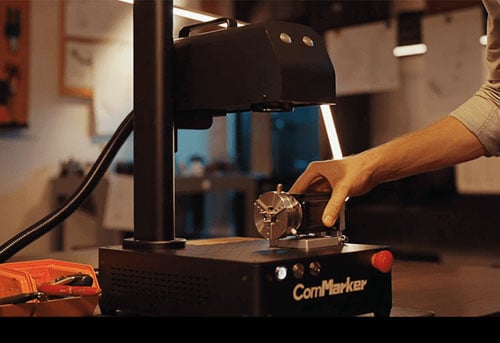
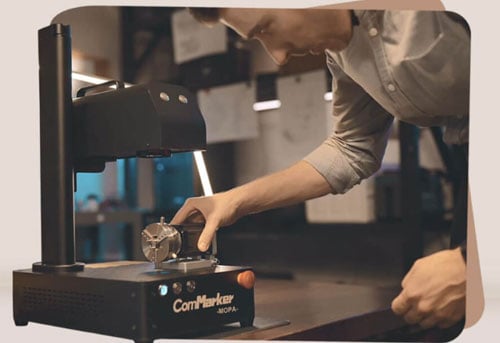
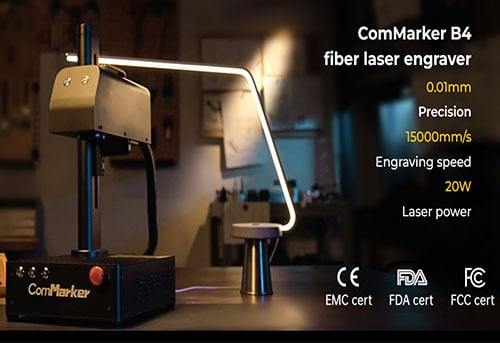
Guia de seis etapas para gravar uma PCB com o gravador a laser de fibra ComMarker B6
Etapa 1: Projete o diagrama de circuito
Comece elaborando meticulosamente o diagrama de circuito para corresponder às especificações desejadas para a placa PCB. Exatidão e precisão nesta fase de projeto são cruciais, pois garantem a funcionalidade e confiabilidade do produto final.
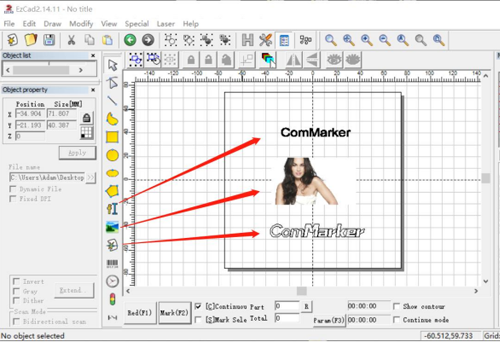
Etapa 2: Insira o diagrama de circuito no EZCAD
Utilize a interface amigável do EZCAD para transferir perfeitamente seu diagrama de circuito meticulosamente projetado. Este software facilita uma transição suave da fase de design digital para a implementação prática no gravador a laser de fibra ComMarker B6.
Etapa 3: Defina os parâmetros
Ajuste os parâmetros de gravação no ComMarker B6. Considere fatores como poder, velocidade, e frequência. A calibração adequada nesta fase é essencial para alcançar o desempenho ideal de gravação e preservação do material.
Etapa 4: Visualizar e ajustar posição e tamanho
Use a funcionalidade de visualização do ComMarker B6 para exibir o diagrama de circuito na placa PCB. Faça os ajustes necessários na posição e tamanho, alinhando o design digital com as dimensões físicas da placa PCB para garantir uma gravação precisa.
Etapa 5: Inicie o processo de gravação a laser
Inicie o processo de gravação a laser, permitindo que o ComMarker B6 grave o diagrama do circuito digital na placa PCB. Monitore o procedimento de perto para garantir que ele cumpra os parâmetros definidos e mantenha a precisão durante todo o processo..
Etapa 6: Verifique o resultado
Depois de gravar, inspecione cuidadosamente a placa PCB. Verifique se as marcações estão alinhadas com o projeto do circuito pretendido e avalie a qualidade geral da gravação. Esta verificação final garante a precisão e funcionalidade do circuito gravado, confirmando um processo de gravação a laser bem-sucedido.