物理操作 (旋转A)
目录
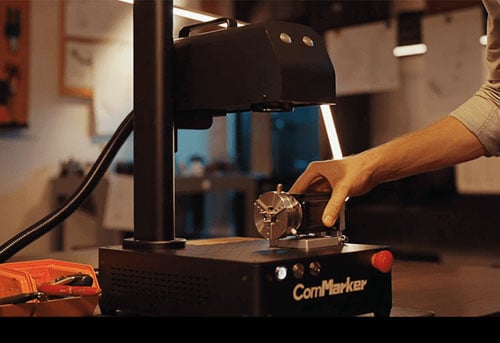
1.连接机器: 附上 光纤激光雕刻机 到旋转卡盘 A 并将旋转体放置在工作台上.

2.夹住物体: 使用逆时针模式夹紧圆柱形物体或使用顺时针模式支撑圆环.

3.调整角度: 如果需要的话, 提升或降低旋转卡盘以改变其角度以获得最佳打标效果.

物理操作 (旋转B)
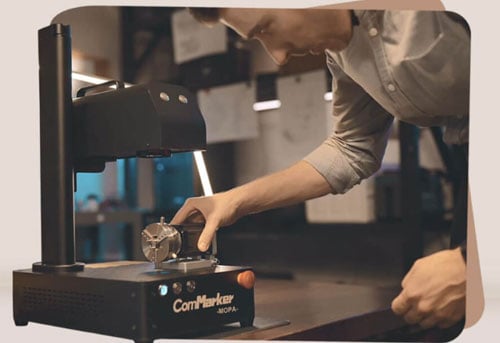
1.连接机器: 将光纤激光雕刻机连接到旋转卡盘 B 并将旋转装置放置在正确的角度,如图所示.

2.夹住物体: 按所示使用正向模式或负向模式夹紧圆柱形物体.

3.调整标高: 如果需要,请用支架提升旋转卡盘,以确保机器可以在正确的焦点处打标.

物理操作 (旋转C)
1.连接机器: 将光纤激光雕刻机连接到旋转卡盘 C.

2.放置对象: 将圆柱形物体放在滚筒上进行标记.

软件操作
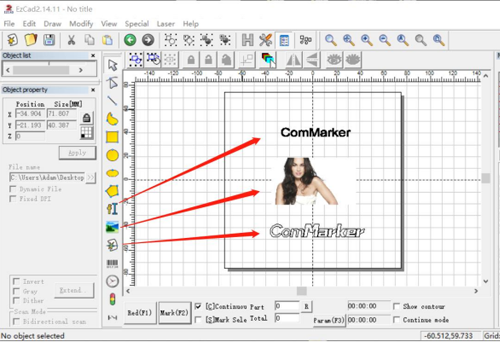
文字标记
- 输入文字:
- 输入您想要雕刻的文字.
- 单击“应用”,然后单击“中心”按钮.

2.启用填充模式:
- 单击 “H” 按钮, 勾选“启用”, 然后单击“确定”.
- 笔记: 不要勾选“标记轮廓”或“所有卡拉”.

3.选择激光选项:
- 从菜单中, 选择“激光”.
- 选择“旋转文本标记”进行简单的文本标记.

4.配置参数 (停止F3):
- 单击“停止” (F3)”并设置 “配置markcfg0”.
- 勾选“启用”.
- 输入每轮脉冲数“12800”.
- 如果需要影响文本间距,请调整比例补偿.
- 如果您想更改单词的标记顺序,请勾选“反向”.
- 选择合适的轴 (X或Y) 基于旋转体的放置方向.
- 点击 “好的 (确认)”.

5.预览和标记:
- 点击“红色” (F1)” 进行预览; 红灯区域表示第一行的第一个字母.
- 按“ESC”退出预览, 如果需要,调整旋转卡盘位置.
- 确保红色矩形预览位于圆柱体的顶部,以进行水平表面雕刻.
- 点击“标记”开始雕刻.

图形打标
1.导入矢量文件:
- 单击“绘制矢量文件”按钮.
- 单击“放置到原点”按钮.
- 单击“H”按钮, 勾选“启用”, 并选择“Z”填充模式.
- 笔记: 不要勾选“标记轮廓”或“所有卡拉”.
- 笔记: 位图文件不适合旋转滚筒打标.

2.选择旋转标记:
- 在菜单中, 选择“旋转标记”.

3.配置分割线:
- 勾选“按分割线标记”.
- 输入物体直径.
- 设置中间线:
- 双击创建一条线.
- 右键单击删除一行.
- 用鼠标拖动来移动一条线.
- 确保直径数字与物体的直径相匹配.

4.强制全部拆分 (选择):
- 勾选“强制全部拆分”.
- 输入物体直径并调整“分割尺寸”.

5.配置参数 (停止F3):
- 单击“停止” (F3)”并设置参数.
- 勾选“启用”.
- 输入每轮脉冲数“12800”.
- 如果您想更改单词的标记顺序,请勾选“反向”.
- 选择合适的轴 (X或Y) 根据滚轮的放置方向.
- 单击“旋转轴”.
- 调整齿轮比数字以避免标记图中出现重叠或间隙:
- 数量较多可减少重叠.
- 数量较少可以减少差距.
- 测试不同数字的准确性 (保留两位小数) 直到满意为止.
- 点击 “好的 (确认)”.

6.预览和标记:
- 点击“红色” (F1)” 进行预览; 红灯区域显示被分割线划分的第一部分.
- 按“ESC”退出预览, 如果需要调整旋转位置.
- 点击“标记”开始雕刻.

如何在相机上用 200mm 场镜替换 110mm 场镜 光纤激光雕刻机?
安装步骤
步 1: 安装 200mm 场镜
- 用手拧开 110mm 镜头即可将其取下.
- 通过拧紧到位来安装 200mm 场镜.

步 2: 重新调整焦距
- 由于新镜头焦距发生变化,请调整焦距.
- 参见操作手册, 特别是关于调整焦点的部分.
步 3: 场镜 9 点校准
1.打开校准软件
- 打开USB文件夹.
- 打开 “ComMarker 的 EZCAD” 文件夹.
- 选择200mm文件夹.
- 打开软件 “CorFile2” (确保先关闭 EZCAD).

2.设置激光源参数
- 单击“F1”, 设置激光源参数, 选择“IPG”并单击“确定”.

3.准备校准表面
- 将两块纸板用胶带粘在后盖上.
- 将其放在工作台上,确保纸板平整.

4.标记校准点
- 单击“F3”标记 9 点矩形. 图表将显示标记点.

5.调整图案以匹配标记
- 单击右上角的按钮更改图案,直到与纸板上的标记匹配.

6.测量并输入坐标
- 测量纸板上各点的坐标位置.
- 使用点 5 作为中心坐标 (0,0).
- 将测量到的坐标输入到对话框的相应栏内.
- 点击 “好的” 保存并返回上界面.
笔记: 确保标尺绝对水平或垂直,且测量线穿过标尺 9 点.

7.生成校准文件
- 点击 “F6”生成校准文件.
- 指定文件名 (例如, “200 B4 通讯标记”).
- 保存文件并记住目录位置.

8.验证校准
- 点击 “F7”验证校准.
- 打开保存的校准文件.
- 单击“F8”标记校准的矩形.
笔记: 如果标记的矩形是规则的, 校准成功. 如果变形, 需要重新校准.


9.在EZCAD2中导入校准文件
- 在EZCAD2中导入200mm镜头的标定文件.
- 导入校正文件参见操作手册.
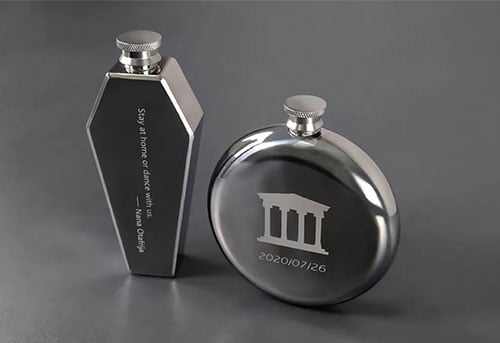
标记照片的参数
笔记: 以下参数是20W机器雕刻不锈钢的建议. 结果可能因文件大小而异, 材料, 和焦距. 根据不同机器或材料的需要调整参数.
不锈钢面积为 110x110mm 的 B4 20W 的参数
在雕刻软件中输入参数.
微调图片的对比度和亮度,使雕刻更清晰.

B4 20W 的参数,涂漆金属面积为 110x110mm
根据具体材质调整参数.

标记不同颜色的参数
笔记: 以下参数是20W机器雕刻不锈钢的建议. 根据不同机器或材料的需要调整参数.

Lightburn MacOS操作教程
1.下载并安装 Lightburn 软件
下载自 莱特本软件.
确保Lightburn版本为V1.3.01或更高版本.

2.安装 Lightburn 软件
将 Lightburn 图标拖至“应用程序”文件夹.

3.复制 EZCAD 文件夹
将文件夹“EZCAD for ComMarker B4”从 USB 复制到桌面.

4.设置设备
打开莱特本, 点击“手动创建”, 然后选择“JCZ光纤”.
确保机器已打开并通过 USB 连接.

5.导入EZCAD Config并选择适当的文件夹.

6.选择文件夹“110mm” (或 200mm,根据您的镜头而定)—->“ 插头”, 然后选择“markcfg7”并单击“下一步”

7.如果一切正常,您可以看到以下窗口, 然后点击“下一步”

8.如有必要,更改名称, 根据镜头输入正确的X和Y轴长度. 点击“下一步”

9.点击“完成”,就会出现在设备列表中

10.当机器启动并通过 USB 连接时,状态将变为“就绪”

11. 从“设备设置”按钮转到“基本设置”, 点击“加载COR文件”, 选择“EZCAD for ComMarker B4”—>“110毫米”, 选择文件“JCZ11.cor”, 点击“确定”

12.更改频率设置“Min 20”, “最多 200 个”. 打开“振镜2”. 并且已准备好使用 Lightburn 控制机器。*(请参考步骤 11 MOPA机用)

JPT MOPA光纤特殊设置
13.更改频率“Min 1”的设置, “最多 4000”. 打开“振镜2”. 打开“启用 Q-PulseWidth 设置”按钮 (确保光纤类型为“IPG _YLP”或“JPT”)

Lightburn Windows 操作教程
- 按照与 MacOS 相同的步骤操作.
- 安装Lightburn软件时安装必要的驱动程序.