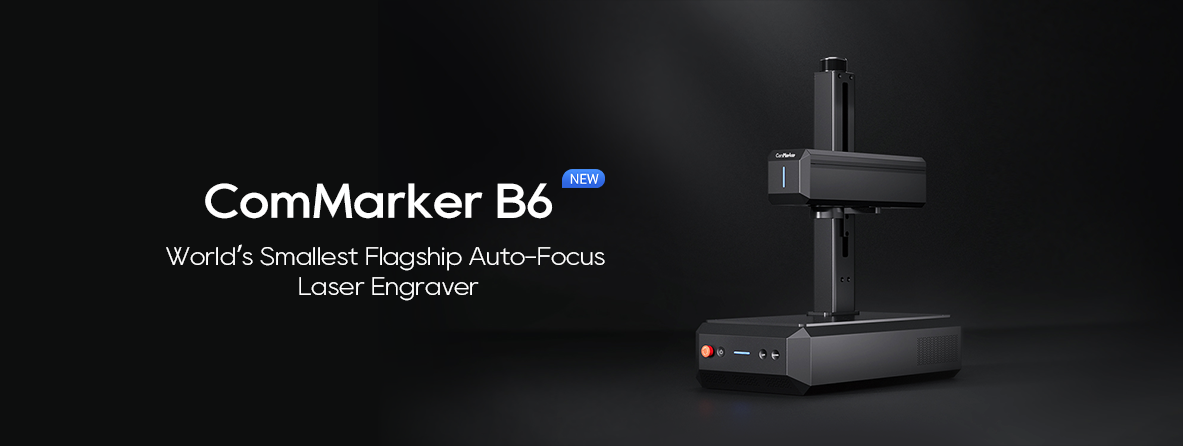
Installing the ComMarker B6 JPT MOPA Fiber Laser Engraver requires careful attention to steps and precautions to ensure proper operation and longevity. This guide provides a comprehensive overview of each installation step and key points to note, enabling you to complete the setup smoothly and make the most of the engraver’s efficiency and precision.
1. Introduction to the Machine
The ComMarker B6 JPT MOPA Fiber Laser Engraver is a high-performance machine known for efficiency and versatility, capable of engraving on a range of materials. With its modular design, it can be assembled as a split or integrated machine to fit different working environments and usage needs.
2. Installation Steps
Before beginning installation, ensure you have all required tools and components on hand, and follow the steps below carefully:
Step 1: Organize Components
Place each component on a stable worktable, ensuring all parts are within reach. This will help avoid misplacement or incorrect usage during installation. Here are the primary components:
- Support pole
- Support shelf
- Laser head
- Baseboard
- Various screws (M5 x 12, M5 x 14, M5 x 10, M4 x 12)
Step 2: Attach the Support Shelf to the Support Pole
Use the M5 screws (typically M5 x 12) to secure the support shelf onto the support pole. Ensure the support pole is stable, as it will hold the laser head, and check that there is no wobbling or misalignment.
Step 3: Install the Laser Head
Place the laser head onto the support shelf and fasten it with screws. Make sure the position is correct, and the laser head is tightly secured to avoid any looseness during operation. Tighten the screws without excessive force to avoid damaging parts or compromising the laser head’s stability.
Step 4: Secure the Support Pole
Use screws to firmly fix the support pole, ensuring that the shelf and laser head assembly remain securely in place on the support pole. Tighten all fastening screws to prevent movement or shifting that could affect engraving quality.
Step 5: Choose Split or Integrated Machine Setup
- Split Machine Setup: Place the machine as-is on the table, ready for use. This configuration is easier for transport and movement, suitable for smaller spaces.
- Integrated Machine Setup: For a more stable structure, assemble the machine as an integrated unit. Use M5 screws to connect each module into one unit, which provides greater stability, especially for long or continuous operations.
Step 6: Optional Auxiliary Riser Installation
When engraving larger objects, you may need an auxiliary riser to extend the support pole’s height. Follow these steps:
- Disassemble the existing support pole as needed.
- Install the riser onto the baseboard, ensuring the threaded holes face upwards.
- Use screws to connect the riser with the original support pole to increase the support height.
- Adjust the laser head’s position to ensure sufficient focal length for larger objects.
Step 7: Replacing the 300mm x 300mm Field Lens
To achieve a larger engraving area, you can replace the current lens with a 300mm x 300mm field lens. Here’s how:
- Remove the existing field lens.
- Install the 300mm field lens and secure it with screws.
- Loosen the four screws on the support shelf (but don’t fully remove them).
- Move the laser head to align with the new field lens’ area.
- Use a ruler to level the laser head, ensuring stability for accurate engraving.
3. Important Notes and Precautions
When installing and operating the ComMarker B6 JPT MOPA Fiber Laser Engraver, consider these essential precautions to avoid unnecessary damage and potential hazards:
- Focus Adjustment
Adjusting the focus is crucial for engraving quality. Use the “Auto” button or manually move the laser head to adjust the focus after placing the material to be engraved. Incorrect focus can result in poor engraving quality or damage to the material. - Field Lens Protective Film
Always remove the plastic protective film from the field lens before engraving. Failing to do so can cause the laser to burn the film, potentially damaging the lens and impacting the device’s performance. - Power Button Operation
When turning on the machine, press and hold the power button for about one second for the machine to start. Avoid rapid presses, which may prevent the machine from starting properly. - Stability Check
After assembling the machine, check that all screws are fully tightened, especially around the support shelf and laser head. This will prevent movement that could affect engraving quality. - Support Shelf Screw Adjustment
When replacing the field lens or adjusting the laser head, do not overtighten the screws on the support shelf. The front two screws should be slightly loosened, as this will make future adjustments easier. - Power Supply Connection
Ensure a stable power connection, avoiding sudden disconnections or voltage fluctuations that could reduce the device’s lifespan and operational efficiency. - Safety Precautions
Since laser engraving involves high temperatures and bright light, it’s recommended to wear protective glasses during operation and ensure proper ventilation in the workspace. Avoid direct exposure of the laser to your eyes or skin.
By following the above installation steps and precautions, you can successfully set up your ComMarker B6 JPT MOPA Fiber Laser Engraver. Correct installation and calibration will not only ensure efficient operation but also extend the machine’s service life. Regular inspections and maintenance will further reduce the risk of issues and help maintain high-quality results.


