Laser engraving technology is a great way to bring the creative imagination into reality, but many forget that the essential intermediary between the laser engraving machines and artwork is the software that needs to be efficiently controlled and run.
The right kind of software allows you to become proficient in etching beautiful designs on various types of material, providing complete control over precision, accuracy, and design elements.
The laser machine ComMarker B4 operates through the Lightburn software, which enables you to upload design files, adjust settings, and control laser parameters such as frequency, laser power, and speed.

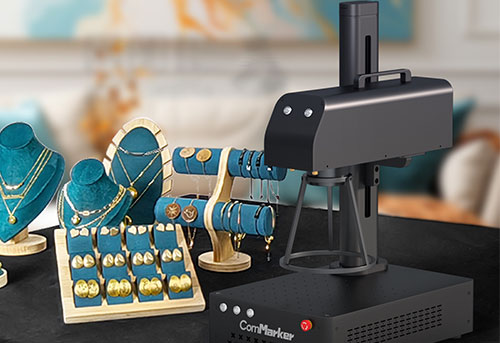
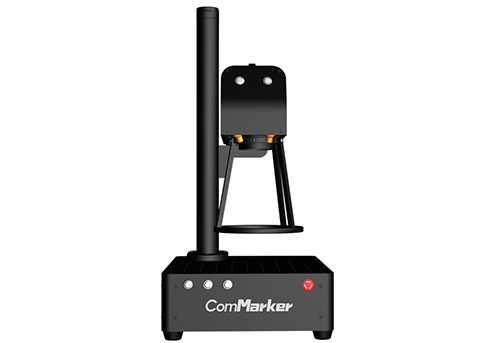
ComMarker B4 20W fiber laser engraver
Electric Lifting: The ComMarker B4-20W features an advanced, concealed lifting motor. 3D Embossing and Deep Engraving: B4-20W laser engraving machine handles intricate, multi-level 3D engraving and deep engraving on metal and rock. Spacious Work Area: 110mm and 200mm dual lenses, marking area with dual red dot locators for precise calibration and focusing. Wide Compatibility: Engrave…
If you’ve bought your first laser machine, ComMarker B4, and really don’t know how to effectively run it using Lightburn, follow this blog for step-by-step guidance.
Table of Contents
Introduction
Lightburn is a software application that instructs laser engraver machines to carve objects by following the path of the design.
It’s a user-friendly interface packed with unique features and diverse design elements for creating, editing, or controlling multiple laser projects. Having features like material presets, job management, and real-time control over the laser, LightBurn provides a seamless engraving experience.
It’s affordably priced, works perfectly with both vector and raster images, and is a native application for macOS, Windows, and Linux.
If you’re a Lightburn operator, luckily, you’re allowed to perform all these tasks, such as:
- It provides complete control to arrange, upload, edit, and even create new vector shapes within the software using its powerful features like offsetting, boolean operations, welding, and node editing.
- It allows you to adjust laser parameters and alter settings like power, speed, number of passes, brightness & contrast, dithering mode, and much more.
- After you’re done with the designing part, you can Import artwork in a variety of common vector graphic and image formats (including AI, PDF, SVG, DXF, PLT, PNG, JPG, GIF, and BMP).
- Send the result directly to your laser engraver.
Importance Of Proper Software For Laser Engraving
In order to translate your designs into tangible products, both professionals and hobbyists need to rely on laser engraving software to complete the engraving process. While most additional purchases beyond your laser machine are optional, you can’t use a laser engraver without software.
Its significance lies in several key aspects that contribute to the precision, efficiency, and overall performance of the laser marking machines.
It provides you with a lot of tools to process your design and artwork into digital files. You can even manage to organize different elements of the designs, especially if it includes multiple passes or engraving with varying parameters.
This gets very handy when you’ve got batch engraving orders. Lightburn enables you to process multiple items with the same design for sequential operations.
Using features like visual previews, the software enables users to reflect on the results and allows them to fine-tune the settings and correct the errors.
Part 1: Installing LightBurn
– A. Installation on Windows 11: Step-by-Step Guide
- Head over to the Lightburn website.
- Click on the top-left button “ Download and Trial” or otherwise click here.
- If you’re a new user or want to avail of the free trial option, you’ll be open to the various versions of LightBurn, and you need to choose one that matches your computer. (You can even check your device version by clicking on the control panel and navigating the system option)
- Click the download link.
- A loading pop-up window will appear, and wait until the download is complete.
- Open the folder and tab on the Lightburn icon for installation.
- After the download is complete, click next and finish.
- In the last step, before finishing, tick the second checkbox, “EzCad 2 Driver (used by Galvos),” and press finish.
- Your installation is done.
– Troubleshooting Common Issues
- Antivirus Interference Issue: As with many software installation processes, you may encounter an antivirus inference that may prohibit you from finishing the task.
Solution: You may block the antivirus option for the time being and add Lightburn to the allowed list of applications.
- Compatibility Issue: A Wrong version of Lightburn is selected that is not compatible with your operating system
Solution: Verify the system version of your device and re-download the software by pressing the correct download link.
- Incomplete or Corrupted Download: The installer file may not be completely installed, or it may get corrupted
Solution: Download the software again and wait until it gets downloaded completely before rushing to install.
- Insufficient system Resource: Limited storage space may lead to installation problems
Solution: Check the minimum requirement of Lightburn and free up some space or close the windows during installation.
– B. Installation on MacOS
– Key Steps For Successful Installation
- Go to the Lighburn website “www.Lightburn.com”
- Press the “Download and Trial” button, and choose the download link “ MacOS”.
- Wait for the download to complete
- Open the folder and drag the software icon to the application folder.
- Double-click the icon to get it installed.
- Complete the process, and you’re good to go.
– Addressing macOS-Specific Challenges
Mismatch Operating System: The Lightburn software often fails to be compatible with the macOS operating system, showing an error when opening the app window.
Solution: Verify whether you’ve selected the right download link that matches your device. If not, uninstall and re-download with the correct version.
Permission Error: MacOS sometimes restrains the third-party software from opening as part of their security system known as gatekeeper.
Solution: Adjust security settings or allow these apps for installation. Go to System Preferences> Security and Privacy > General, and under “Allow applications downloaded from,” press “App Store Identified Developer.” You can follow Lightburn security configurations to handle this issue.
Outdated version: You might be using the old version that shows an error when installing the software.
Solution: Make sure you’re using the latest version and downloading it from the official website or a trusted source.
Part 2: Setting Up ComMarker B4
– Overview Of ComMarker B4 Features
ComMarker B4 is a compact, handheld, industrial-grade fiber laser machine equipped with a high-power fiber lens to create a remarkable engraving with 0.01mm precision and go deeper up to 0.3mm on metals. The good part is B4 laser machine is an optimal choice when you’ve extensive use of the system– it has a service life of about 100,000 hours.
Having a laser power of 20W and an engraving speed of 15,000mm/s, it works 10 times faster than any other model.
It operates in the infrared wavelength of 1064 nm, which makes it an optimal choice for engraving all types of metal parts, leather, and plastics.
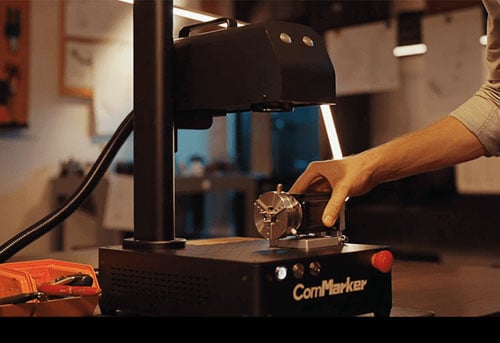
This system has two parts in place- a base with a fiber laser source and the laser head with a galvoscanner that directs the beam through the Field lens into the workpiece.
It comes with a rotary attachment that engraves cylindrical-shaped objects very well. Additionally, two field lenses are available to cover a working area of 110 * 110mm for finer engraving and 200 * 200mm for large engraving.
– Preparing the ComMarker B4 for first-time use
Preparing the ComMarker B4 fiber laser machine means you’re ready to set the foundation for successful engraving operations. Ensuring a smooth, safe, and organized workspace is key to attaining remarkable engraving results.
Cleanliness Comes First:
The first step in settling up the B4 laser engraver is to make sure the working area is thoroughly clean and free of any contaminations, dust, or debris. These obstructions, when they interfere with the machine’s operation, can impact the quality of marking and device longevity.
Put yourself in the habit of cleaning material, workbed, and other components for an exceptional marking outcome.
Choose The Correct Placement Of The Machine:
It’s very necessary to put the B4 laser machine in a stable position so that the device can produce smooth and uneven markings. Any kind of vibration and movement can lead to distorted or inaccurate etching.
A working table would help you level up the height, adjust the focus point, and keep the machine in place.
Secure the Material:
Once you’re done with the above two tasks, the next step is to ensure the material held in place is appropriately fixed into the workbed. Make use of the positioning bars to fix the object for engravings. For engrave the cylindrical surface objects such as tumblers, mugs, or cups, make use of rotary to secure the objects in place. You can also use positioning bars to fix the cylindrical object, and then select the cylinder engraving function to work on cylindrical objects.
Work for Stable Power Connection:
Connecting the B4 laser machine to a secure and appropriate power supply is crucial for consistent operation. This calls for a thorough understanding of the power requirement for the system, which you can read from the product manual or instructions guidebook.
A stable and uninterrupted power supply helps achieve desirable, accurate, and outstanding engraving on a range of materials.
Install the Machine-Compatible Software:
Now comes the technical part of installing the Lightburn software for operating ComMarker B4 by following the guided steps mentioned above.
After the software’s successful installation, you can design your own artboard containing all your creativity and artistry into a digital file.
This software helps you configure settings and adjust marking parameters for more defined engraving. Depending on the material used, you can regulate the spot size, frequency, desired marking depth, speed, and power of the laser beam.
ComMarker suggests Lightburn for all their fiber laser machine models. An optimal setting would contribute to accurate, precise, and perfect-looking results.
– Safety Considerations
Above all, It’s always advisable to exercise caution and take safety measures seriously to avoid accidents or unforeseen situations.
- Always go through the product manual and follow each guideline for a safe operation.
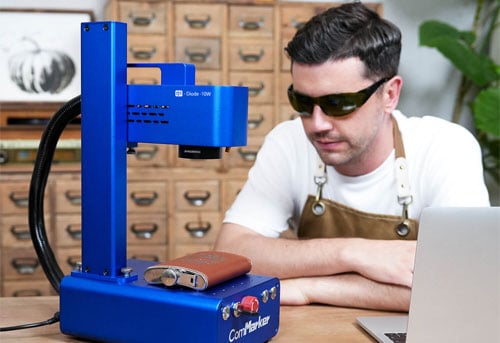
- Put on safety goggles to protect your delicate eyes from laser radiation.
- Familiarize yourself with the machine’s safety features, such as emergency buttons and safety interlocks, and ensure they’re all functional.
- Regular maintenance and safe use of your laser machine are the keys to your machine’s extended lifespan. It also reduces the risk of downtime and costly repairs.
Part 3: Connecting ComMarker B4 to LightBurn
For connecting the ComMarker B4 to Lightburn, ensure that the software has been installed correctly, and after the software installation is complete, check the option: Install EzCad2 driver (used by galvos).

On the Device button, press “create manually” and find “JCZFiber,” Click. “import EZCAD config,” and try to find the drive file with the name “markcfg7” from the folder we’ve copied on the desktop before. Click “Next.”
Enter the name of your laser, and choose the dimensions of the work area. It can be 110 *110mm or 200 * 200mm.
Click Finish to finalize the device connection and press close to exit the device window.
In the laser window at the right, you can see the laser status showing “ready.”
Software Settings And Adjustments For Optimal Performance
General Engraving Settings:
Adjust the values dictating what material is put under the laser head for optimal power and speed. Select a Higher power, low speed for more complex materials, and a lower power, high speed for softer ones.
LightBurn also gives you options to modify the contrast and brightness of the design. Play around with these settings to enhance the visibility and clarity of the engravings.
When working on images, maintain the threshold and fine-tune the options to control the darkness of the engraving. Get the right balance to achieve the desired level of detail.
Additionally, select the image modes as Jarvis for smooth shaded or photo images.
Using the scan gap or line interval option, control the distance between each pass. Minimum intervals will accelerate your engraving quality and work for intricate design engravings but take quite longer to engrave materials.
Minimizing dot width will decrease the width of the laser dots and adjust for the beam size. Enter parameters smaller than the line spacing.
Advanced Engraving Settings:
You can choose an appropriate dithering method under the image mode for shaded images and gradient photos. The most recommended mode is Jarvis.
How To Troubleshoot Connectivity Issues
Various components are involved that establish the connection between the laser machine and the computer software. Check if any of them are missing to rule out the malfunction.
- Check if your computer’s cables connecting to the laser are securely plugged in. Asses whether the USB is attached to the working port (you can try using a different port to see if it works) and ensure the power supply is stable.
- Most often, the connection problem occurs because the operator hasn’t Install EzCad2 driver (used by galvos) in the dialog box at the end of the Lightburn software installation.
- Sometimes, the power cycle is the reason for the undeveloped connectivity. Try to power off both the computer and the laser machine for a while. Wait for a few minutes and start it again.
- Check whether you’ve selected the correct device in the Laserburn settings. Go to Lightburn and check the device that the right machine is selected.
Check the following video for a more elaborative solution: https://www.youtube.com/watch?v=d_QFff-ZfM0
Part 4: Starting Your First Project
– Creating A Simple Design In Lightburn
Using a combination of toolbars, drawing tabs, and windows available at Lightburn, you can start designing any pattern, text, images, or pictures of your choice. You can even change the size by manually putting the values in the width and height box– and can create multiple layers thereupon.
Click and drag the shape on the workspace using different drawing tools like Rectangles, Lines, Bezier, and Circle. Play around with these tool options to edit and modify their properties, such as editing colors, dimensions, positions, and other attributes as desired.
You can even import existing files by clicking on the ‘file’ menu and press ‘input’ to add vector graphics and images, such as png and ai, or use ‘open’ to add files types in Lgbn.
Using a text tool–by clicking and dragging to the workspace–you can write names, messages, or any other texts you want to add to your design. You can also use different fonts with the help of this tool.
Finalize your design elements and before you instruct your software to proceed with laser engraving, look for the preview to ensure how it will look when executed.
Once you’re completely satisfied with the design, Just click start, preview it, and you can send the file to the ComMarker B4 laser machine
– Best Practices For Engraving
Engraving is such a delicate process that demands attention to detail. No matter how powerful your laser machine is, some considerations would actually make a difference.
First, check whether or not your laser machine can effectively work with the material intended to engrave. For instance, if you own a UV or fiber laser and have metal objects to engrave, you can easily mark your engravings with no hassle. However, your CO2 laser won’t do much on metal surfaces. So, determine the type of laser you’re using and then begin your tasks.
Depending on the engraved material, you can adjust the laser settings, such as power and speed. Generally, a high-power B4 fiber laser of 20W can work efficiently to etch metals; however, a 30W CO2 laser can easily engrave ceramics with the help of the color paper. So, check the characteristics of various lasers and applicable materials online or ask experts at ComMarker.
Ensure that the focus is correct. The focal can be measured and adjusted manually, or the appropriate focal can be adjusted by a three-point red light.
Calibrate your preview for accurate scaling and positioning. This is important because it guides where exactly you want your engravings to be.
Get yourself aware of the raster and vector images. Try using these image settings for outlines and filling areas with patterns.
Use color mapping to assign each element of your design with different settings.
Always perform test runs on scrap material to optimize your settings.
Conclusion
This guide has taken you through all the steps–from preparing the B4 fiber laser machine to processing it for engraving using LightBurn software.
Obviously, by taking this guide as a reference, you can get your creative designs on the object in no time. Yet, experience and work tricks can make you achieve more accurate results.
However, we’ve some expert advice for you.
Always inspect the machine’s material compatibility charts. Each material responds differently depending on the depth, thermal compactivity, and composition, so sound knowledge about the materials is paramount.
Conducting a test run before the actual engraving would really help operators optimize the laser settings.
Keep note of the machine’s optimal settings and parameters. This can be set as a reference for future projects.
Good luck!
Appendix
Frequently Asked Question
- Why is lightBurn not picking my laser?
If Lightburn Doesn’t find your laser, try doing a manual setup. Press “Create manually,” select “JCZFiber” as your laser, click ‘import EZCAD config’ and enter the appropriate dimensions. Be sure to turn off ‘auto-home on startup’ if your device doesn’t have limit switches.
- Can I use Lightburn With Diode or CO2 laser?
Yes, Lightburn can work with both Diode and CO2 laser. You need to set the corresponding laser or controller according to the machine in Lightburn and configure the speed, power, and other settings accordingly.

ComMarker CO2 Laser Marking Machine
Industry-leading CO2 Galvo Laser engraver and Marking System Different from fiber laser engraver machine ,CO2 laser marking machine adopt CO2 RF
- Why is my laser not responding to Lightburn’s commands?
Examine your connection settings. check that Lightburn has selected the correct laser and that the laser is not paused or in an emergency stop state. You can look for the Laser status under the laser window of Lightburn. Ensure it shows “Ready.”